[ad_1]

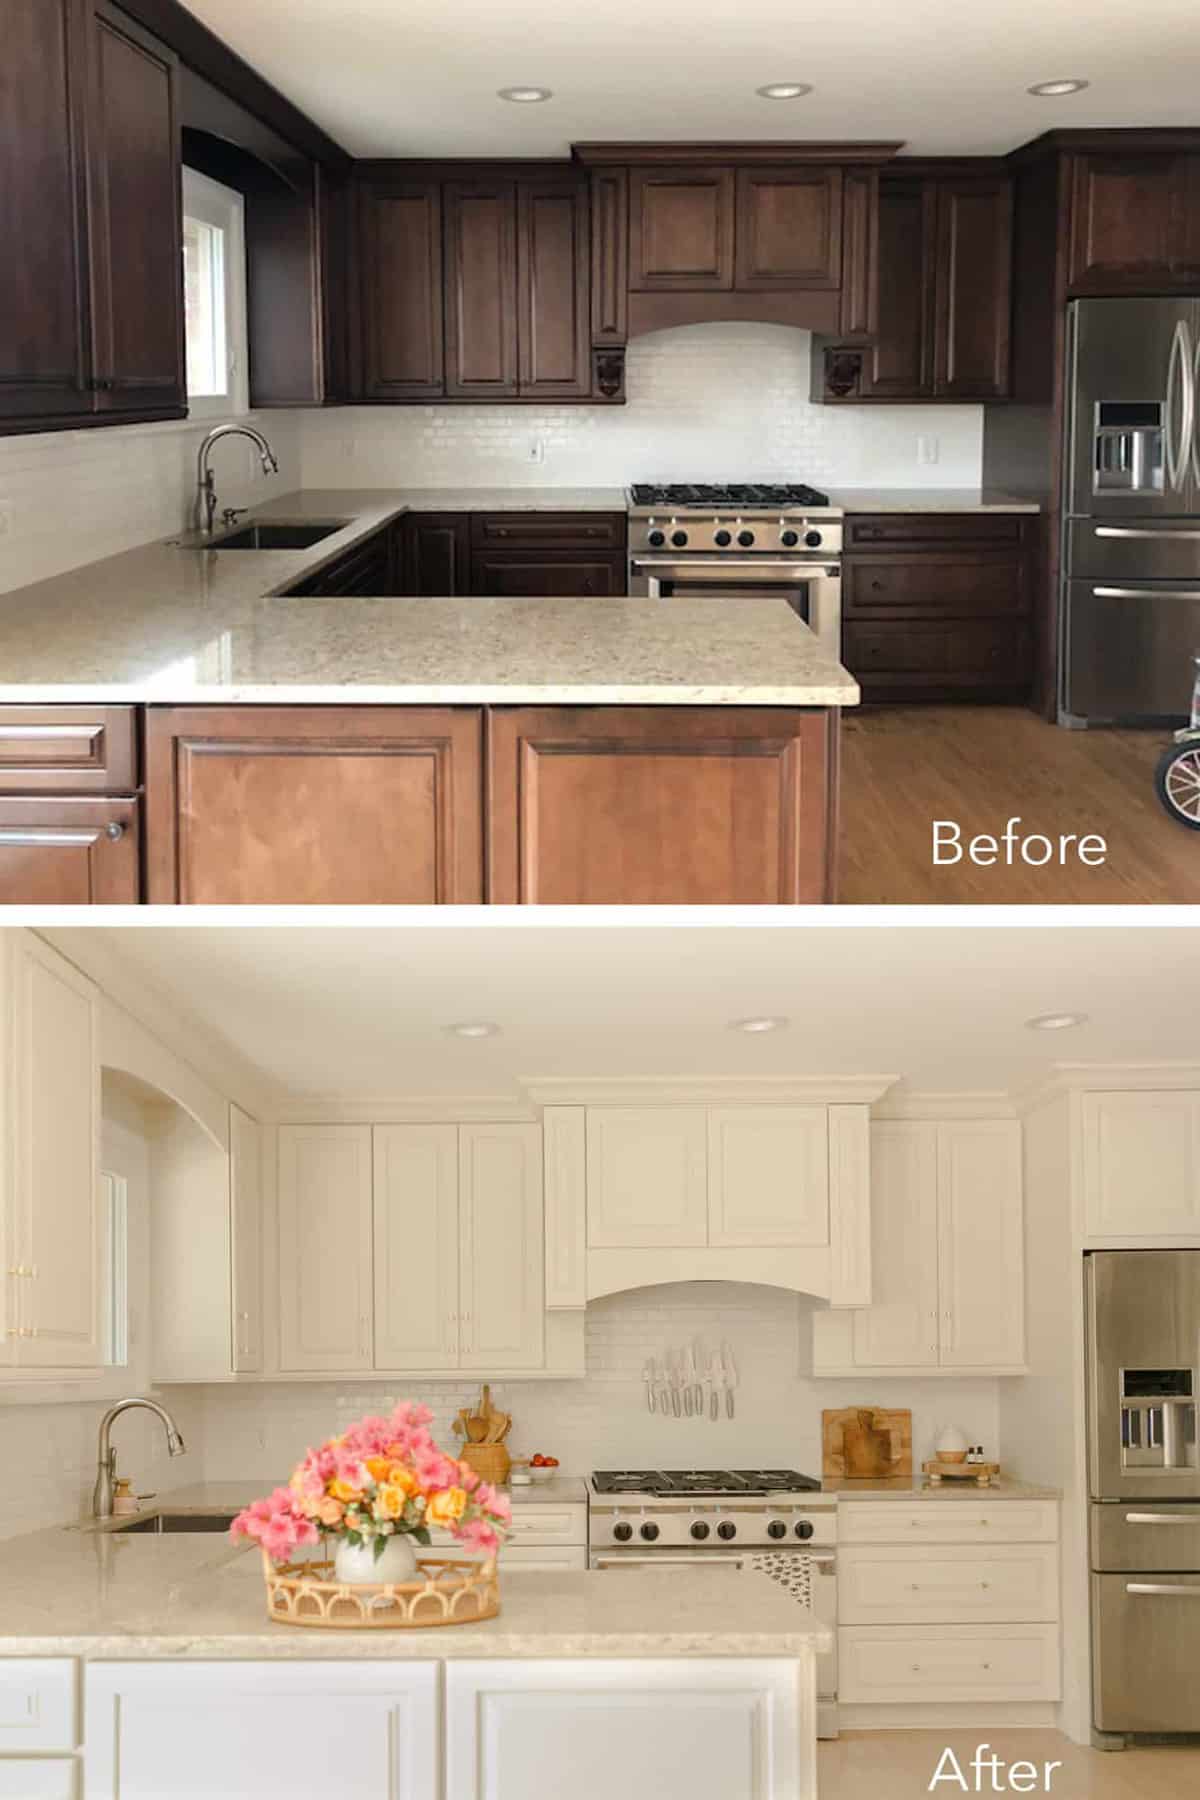
Painting your kitchen cabinets can make a huge difference in the appearance of a room. However, if not done properly, the results can be disastrous. When armed with the right knowledge, you can paint your cabinets and know that the end results will be beautiful and durable.
Let’s talk about different types of paints as well as classic and trending colors for this year. Here is everything you need to know to choose the best paint for kitchen cabinets.
Types of Paint:
There are many different types of paint, but the main thing we recommend is something high quality and hard drying.
As you’ll see below, the steps to painting your kitchen cabinets require a lot of prep work and labor. So, don’t use cheap, low-quality paint because after all that hard work it’s just going to chip off over time and use.
You also want to use hard drying paint because kitchen cabinets are different from interior walls since they get a LOT more wear and tear. Think how often you touch your cabinets (to get things from the drawers or put things away in the cabinets) while you likely don’t touch your walls very often at all.
The Best Paints for Kitchen Cabinets:
Can I Use Chalk Paint?
Yes, you can use chalk paint on kitchen cabinets, but we recommend reading https://abeautifulmess.com/painting-cabinets-with-chalk-paint-pros-cons/”>Painting Cabinets with Chalk Paint (Pros & Cons) first.
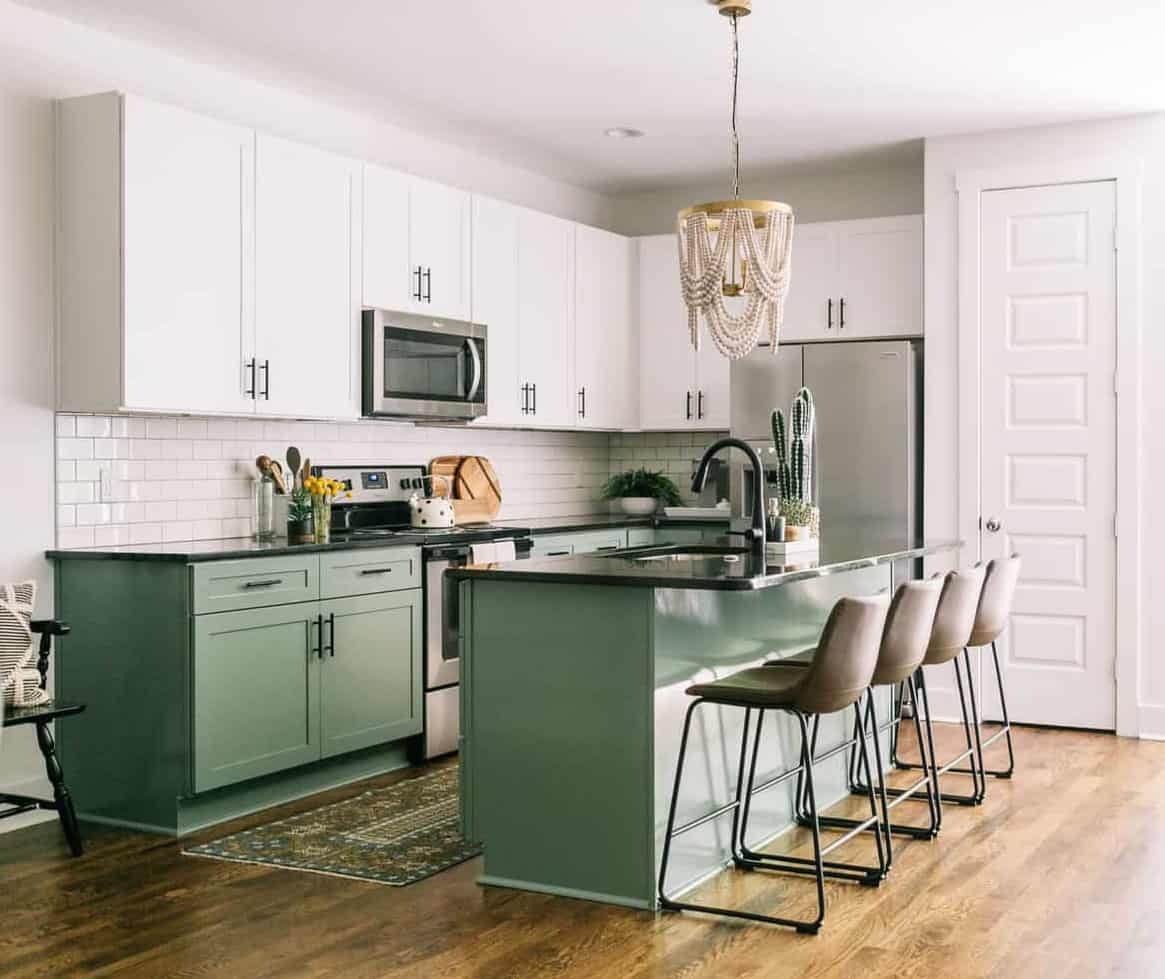
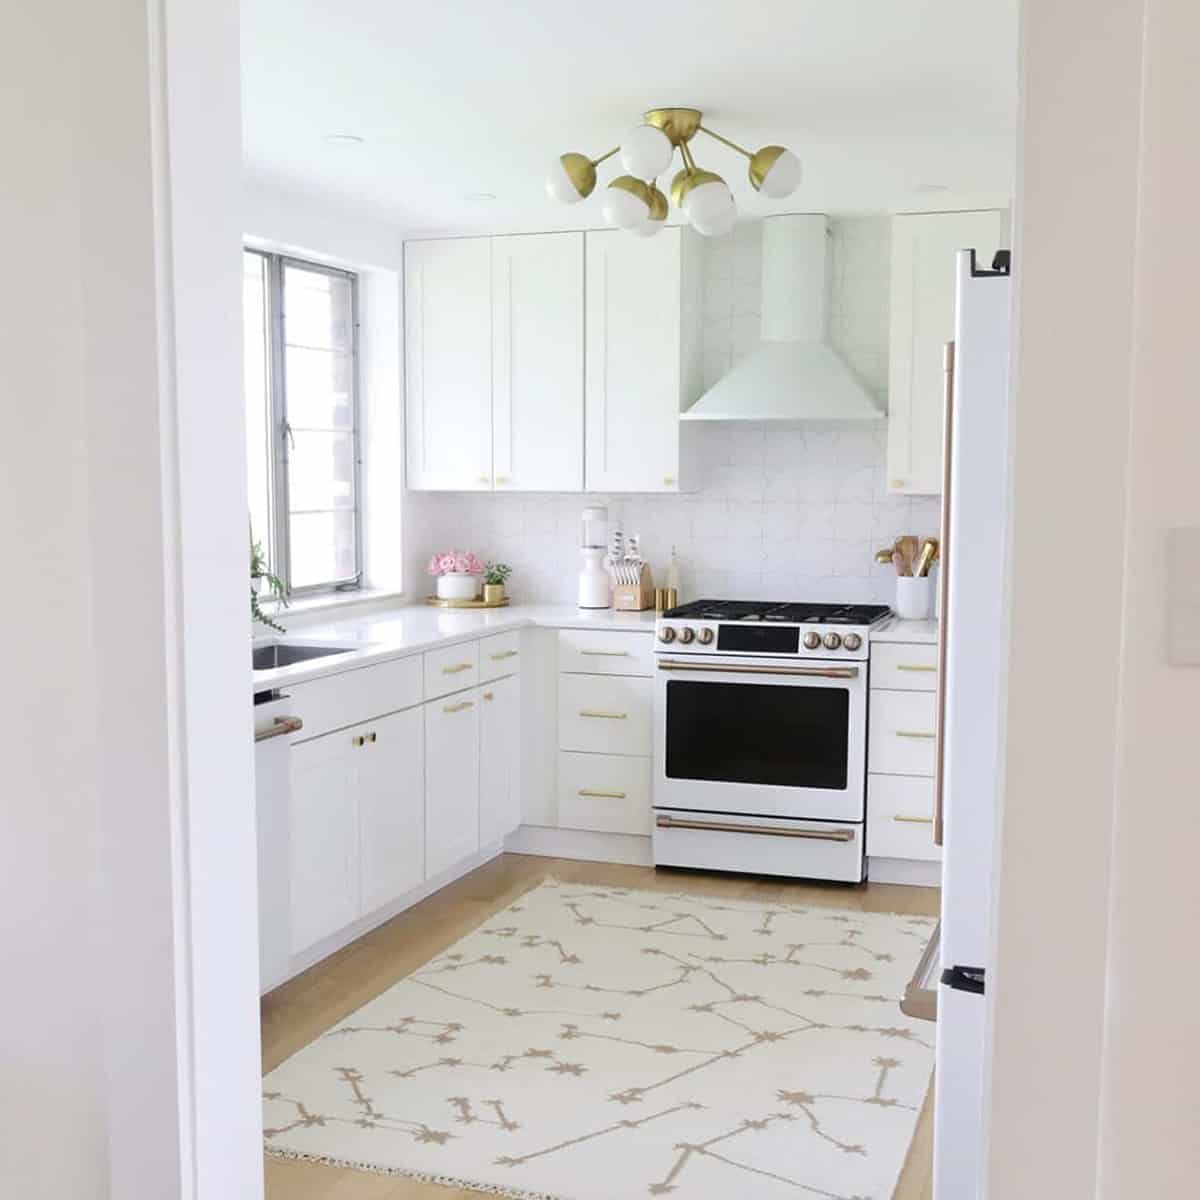
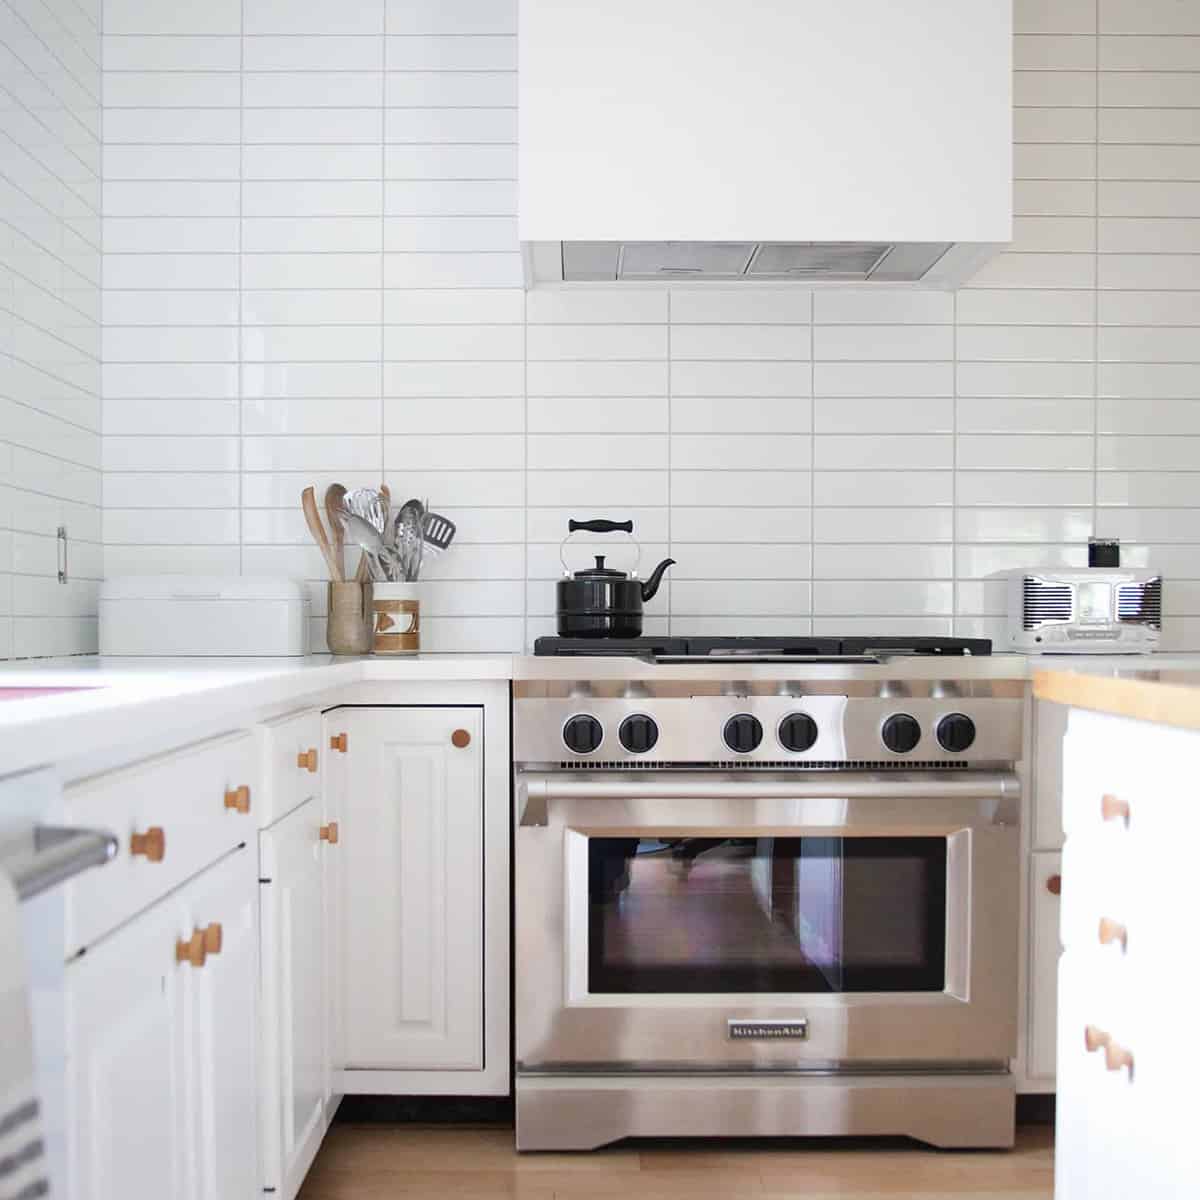
Favorite Kitchen Cabinet Paint Colors in 2022:
How to Properly Paint Kitchen Cabinets:
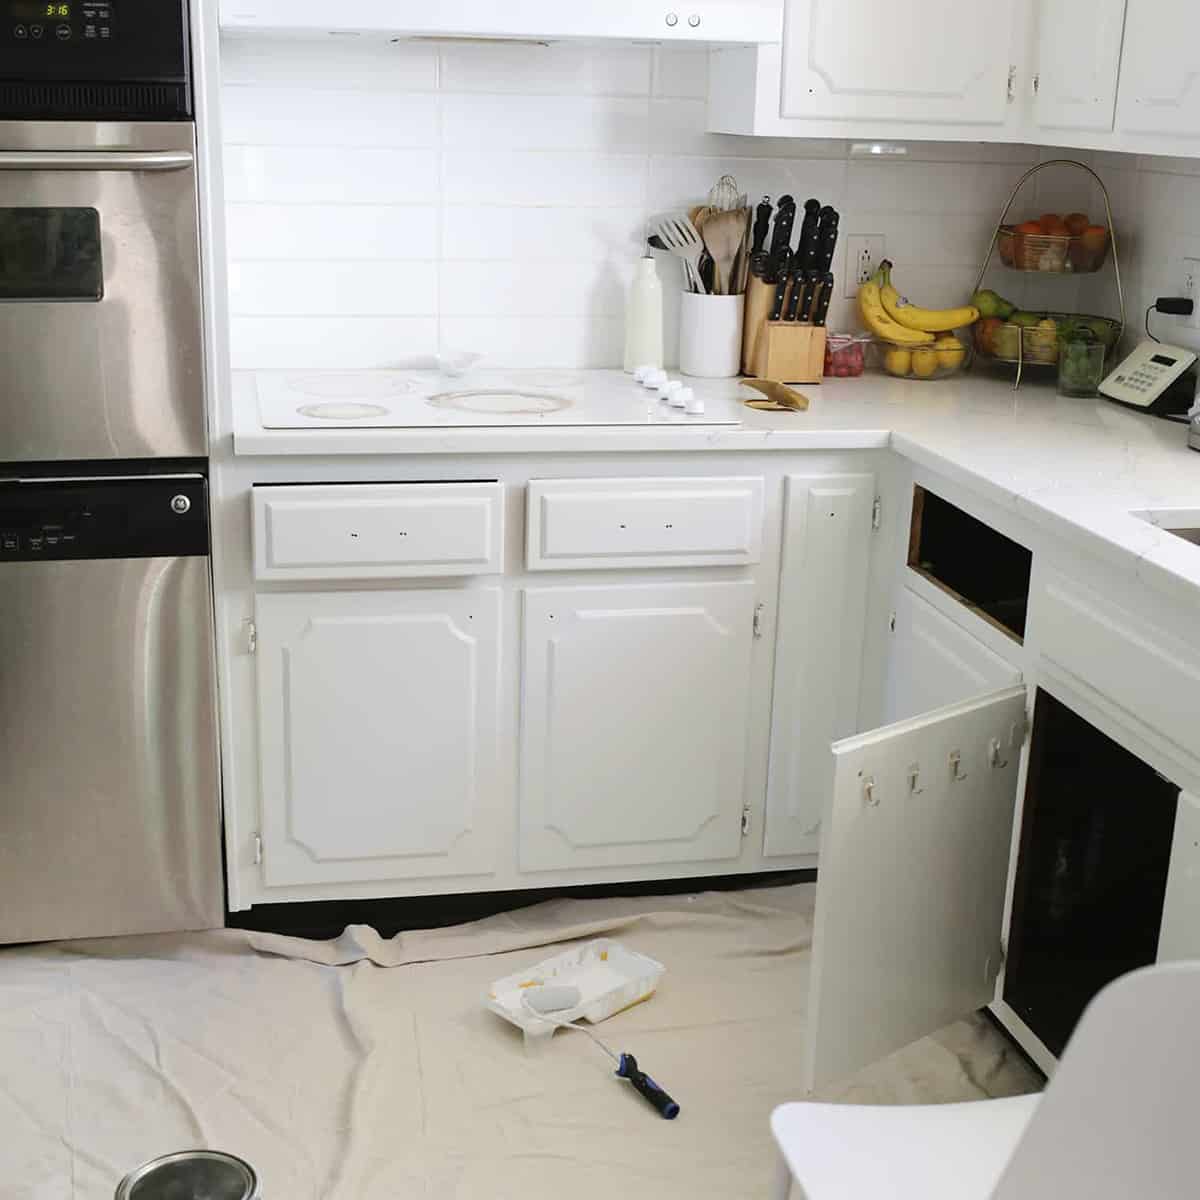
Step 1. Remove the doors and drawers from the cabinet boxes. Take off any hinges, handles, or any other hardware that may be in the way of painting.
Tip: Number the doors with a sharpie underneath the spot where the hinges go and cover with a small piece of https://rstyle.me/+SGFkZSi2RV4ujURcUziWHA” target=”_blank” rel=”noreferrer noopener nofollow”>painters tape. This will make it easier when rehanging the doors.
Step 2. Clean your cabinets. One of the most important steps in the process is ensuring that all grease, grime, and gunk is removed from all of your cabinets. If there are any especially greasy cabinets, we recommend spraying the surface with https://rstyle.me/+E0ebBOzTBDhUmfN-kXlzoQ” target=”_blank” rel=”noreferrer noopener nofollow”>Krud Kutter Degreaser.
After excessive grease is removed, wet a clean rag with https://homedepot.sjv.io/Jr693r” target=”_blank” rel=”noreferrer noopener nofollow”>Liquid Sandpaper/Deglosser and wipe down thoroughly. (We recommend wearing rubber gloves when using liquid sandpaper.)
Step 3. Sand. All surfaces must be thoroughly sanded using https://homedepot.sjv.io/Ea6Lne” target=”_blank” rel=”noreferrer noopener nofollow”>a fine grit sandpaper (180 or 220 grit). If you have one, you can also use anhttps://homedepot.sjv.io/NKx5dv” target=”_blank” rel=”noreferrer noopener nofollow”> electric sander to help speed up the process. There is no need to sand the surfaces down to the bare wood—you just want to make sure that the surfaces are thoroughly scuffed.
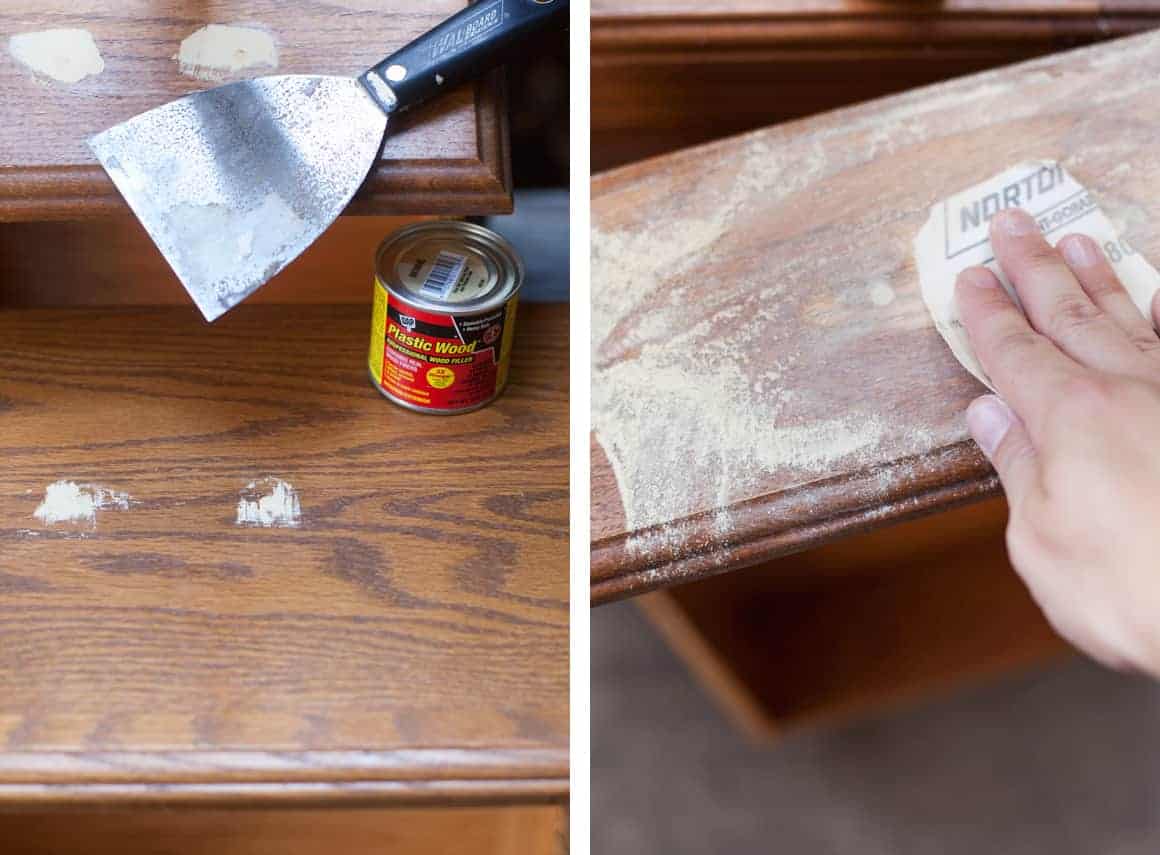
Step 4. Remove dust from all cabinet surfaces. To remove the bulk of the dust, you can dust with an old paint brush. If you have an air compressor, you can blow the dust off with a blower nozzle.
Next, while wearing rubber gloves, get a clean rag and apply some https://rstyle.me/+CeOKgzoxQ00L7iJOnJgL7A” target=”_blank” rel=”noreferrer noopener nofollow”>denatured alcohol to it. Wipe the remaining dust off the surfaces with the rag.
Step 5. Cover up the floor, countertops, backsplash, and walls as needed. To do this, you can use https://rstyle.me/+SGFkZSi2RV4ujURcUziWHA” target=”_blank” rel=”noreferrer noopener nofollow”>painters tape, plastic, paper, https://rstyle.me/+XpZy6kNsEdjzaXOkk_SpRA” target=”_blank” rel=”noreferrer noopener nofollow”>canvas drop cloths, or a combination of all.
Step 6. Prime the cabinets. Now that the cabinets are prepped, it’s time for a coat of primer. If you have a https://homedepot.sjv.io/QMGX6″ target=”_blank” rel=”noreferrer noopener nofollow”>paint sprayer and are comfortable using it, the most durable primer is https://homedepot.sjv.io/4vgb3″ target=”_blank” rel=”noreferrer noopener nofollow”>shellac. The downside to this primer is that it needs to be sprayed using a respirator, as it’s very odorous.
The product can be cleaned up with either denatured alcohol or an ammonia and water mixture. For all the DIYers out there that are using a brush instead of a sprayer, the second best product to use on your cabinets is a high quality https://rstyle.me/+2jzJ-MwBFzrdS36pVLSQDg” target=”_blank” rel=”noreferrer noopener nofollow”>water-based bonding primer.
Do your research on this and be sure you purchase a primer that will bond well to high traffic surfaces.
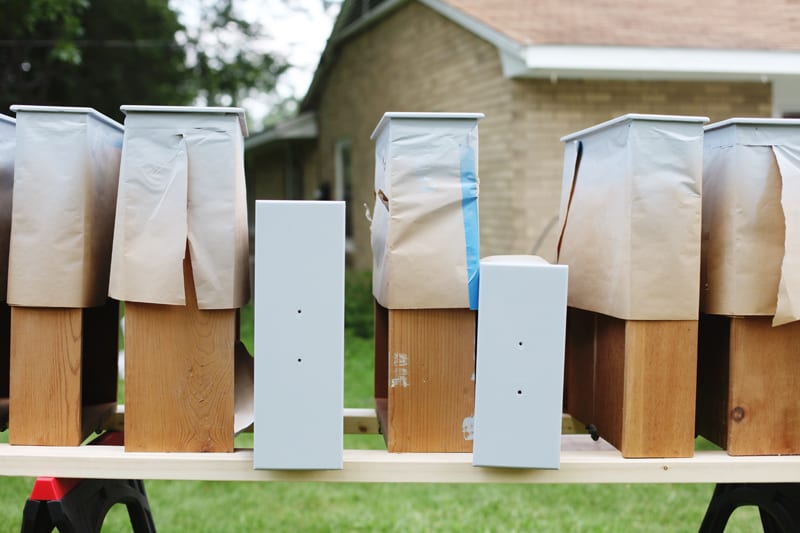
A paint sprayer gives the smoothest finish, but you can also brush or roll on the paint. A rolled and a brushed finish can turn out very nice. There is no difference in durability between spraying or hand painting.
Recommended Sprayers:
–https://homedepot.sjv.io/QMGX6″ target=”_blank” rel=”noreferrer noopener”>TrueCoat Airless Paint Sprayer
–https://homedepot.sjv.io/979ZE” target=”_blank” rel=”noreferrer noopener”>Pro Cordless Airless Paint Sprayer
Tip: When spraying, we recommend using a https://homedepot.sjv.io/krkvV” target=”_blank” rel=”noreferrer noopener nofollow”>Graco 308 FFLP or a https://homedepot.sjv.io/PMAgR” target=”_blank” rel=”noreferrer noopener nofollow”>410 FFLP size tip.
Step 7. Lightly sand. After the primer is fully dry, lightly sand the surfaces with https://homedepot.sjv.io/Ea6Lne” target=”_blank” rel=”noreferrer noopener nofollow”>220 or 320 grit sandpaper. Remove any additional dust, and then you’re ready to paint.
Step 8. Paint. Once you have prepped and primed, the cabinets are ready for the first and second coat of paint. Do not cut costs on your cabinet paint. It is very important to purchase https://homedepot.sjv.io/a1obbW” target=”_blank” rel=”noreferrer noopener nofollow”>a high quality and hard drying paint (urethane alkyd enamel) that will withstand daily usage.
Recommended Drying Time:
Be sure to allow plenty of dry time between coats of paint. Most paints recommend 2-4 hours of dry time between coats. Dry time can be sped up by using fans, and being in a low humidity environment.
Step 9. Remove all masking and tape.
Step 10. Reinstall doors and drawers. Most modern https://www.gopjn.com/t/TUJGRk1OTEJGTEZGSkpCRktOSU1G?url=https%3A%2F%2Fwww.schoolhouse.com%2Fpages%2Fsearch-results%3Fq%3Dhinges” target=”_blank” rel=”noreferrer noopener nofollow”>hinges can be adjusted if necessary to ensure the doors are hanging properly.
What Not to Do:
There are several things that may cause your paint job to not last:
- Not cleaning and sanding your cabinets properly or thoroughly. We can’t stress this step enough. Prep is key to long-term durability.
- Not using a bonding primer before painting.
- Using a latex paint instead of a urethane enhanced enamel. Traditional latex/water-based paint will never dry hard enough to withstand constant touch, and will become sticky and eventually start to peel off.
Don’t let this overwhelm you! The project will be very rewarding in the end! Follow the steps outlined above and you can be sure your newly painted cabinets will look great and last for years.
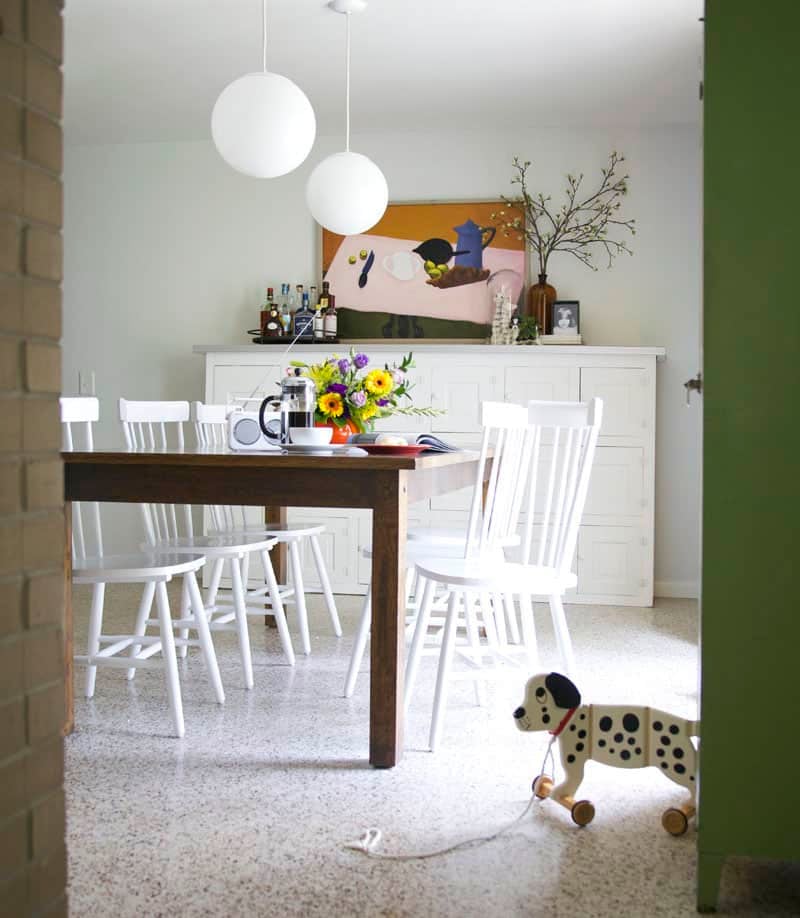
You can use the same steps for painting furniture—like wooden dining chairs.
Is it Better to Spray or Roll Kitchen Cabinets?
Spraying is a better painting method for kitchen cabinets than rolling because it will not leave a texture, (while rolling will). Spraying is also faster, but requires quite a bit of prep work and equipment. Keep in mind you can rent a paint sprayer if you do not wish to buy one.
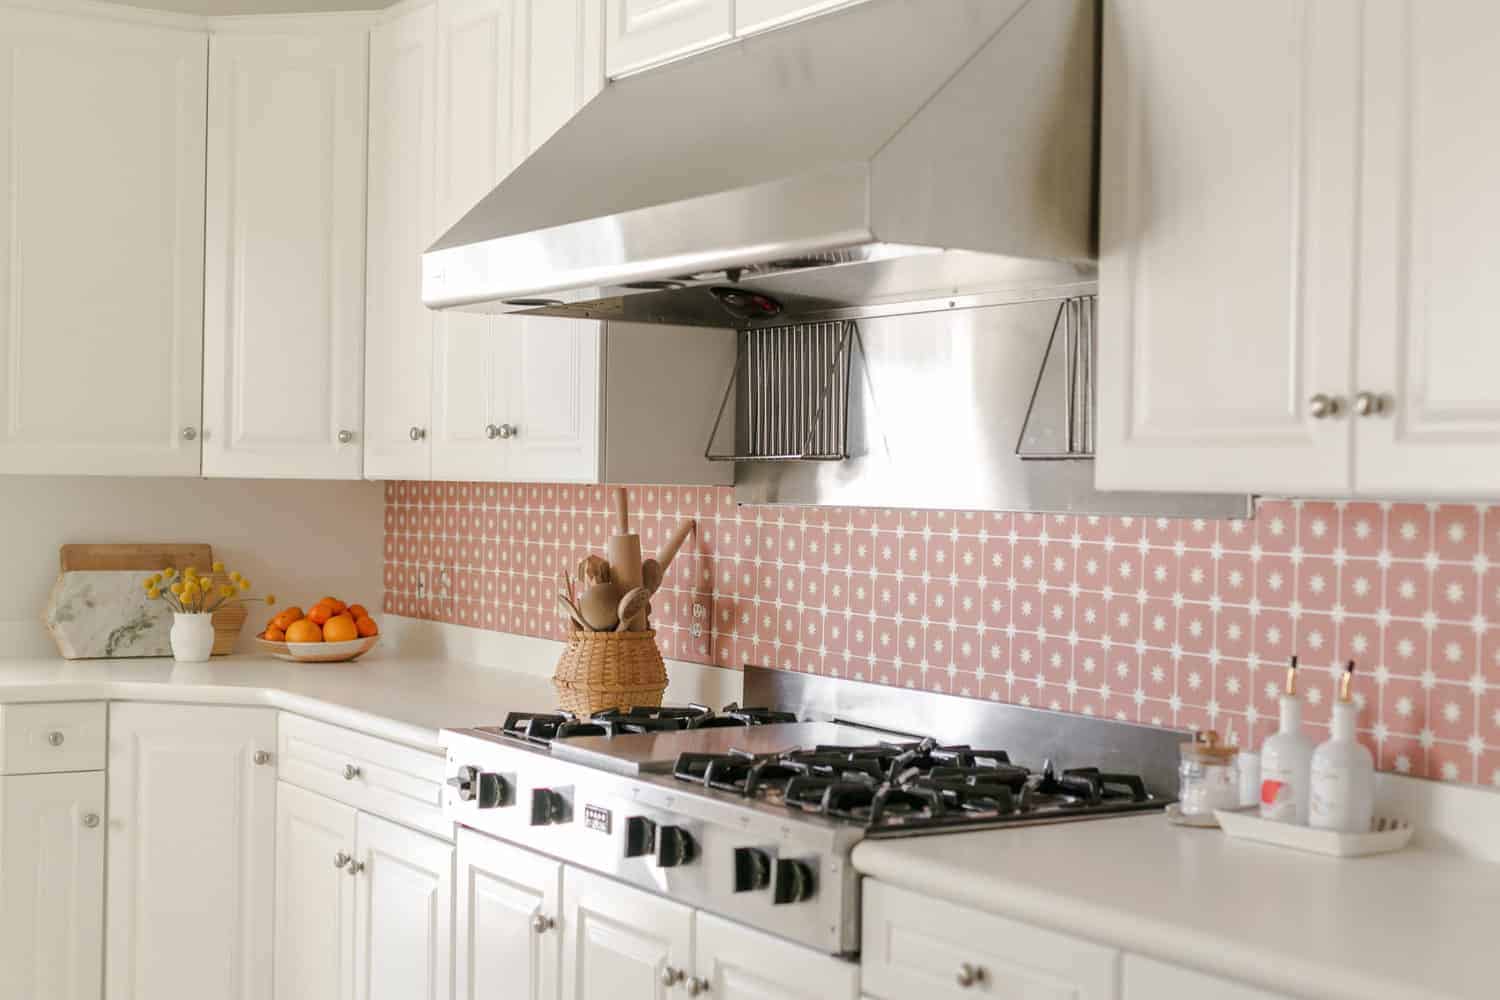
Once you’ve painted your kitchen cabinets you might look around and want to update your kitchen backsplash or countertops. Here are some related posts:
Backsplash Ideas:
Countertop Ideas:
Let us know if you have any questions, or if you use this tutorial! xo.
https://abeautifulmess.com/whats-the-best-paint-for-kitchen-cabinets/”>