This post may contain affiliate links. See my disclosure policy.
Fresh, flavorful and delightfully crunchy! This Refrigerator Pickles recipe couldn’t be easier – no special equipment or sterilizing required. All you have to do is pack the cucumbers into jars with some dill, garlic and a simple brine and then all that’s left to do is wait for a day and they’re ready for snacking!
Easy Refrigerator Pickles
Every year I tell myself I’m going to limit the cucumber plants I grow and then every year I disregard my plan and end up with more cucumbers than I can handle. But then I tell myself that it’s okay, because not only do I bring smiles to the faces of friends and neighbors when I show up at their door with a basketful of fresh cukes, it also gives me the perfect excuse to make at least a couple of rounds per season of a favorite snack: Refrigerator pickles!
And really, like I need my arm twisted to put these garden-fresh beauties to use.

Refrigerator Pickles Ingredients and Variations
You just need a small handful of ingredients to churn out delicious pickles. And you can be as simple or elaborate with the spices as you prefer. Here’s what you’ll need to make these homemade refrigerator pickles:
- Pickling cucumbers: Be sure to select cucumbers that are meant for pickling (e.g. Kirby cucumbers). Mini Persian cucumbers also work great. These are a short variety that remain nice and crispy and they have small seeds. You can use English cucumbers but they won’t be as crisp and they also have an abundance of large seeds which will become mushy, so first remove the center of the cucumber.
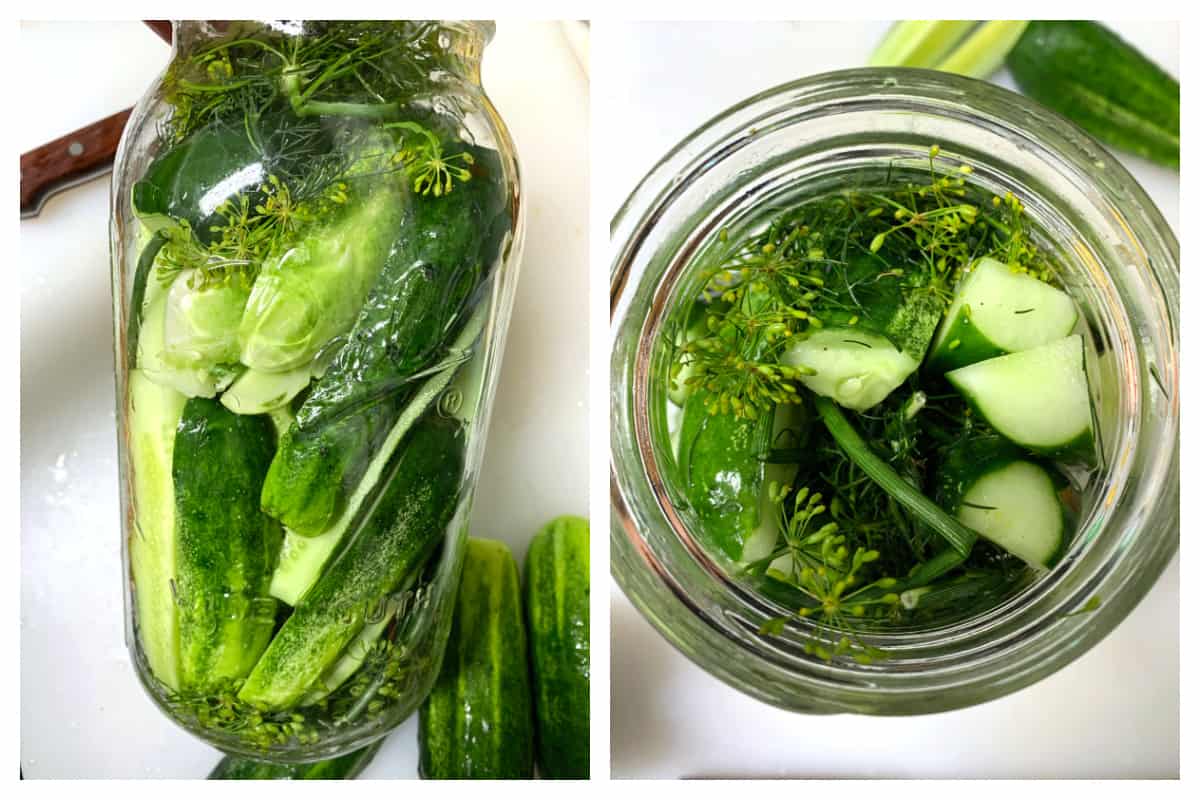
- Fresh Dill: You can use dill heads, dill leaves, dill stems, or a combination of the three. I’m a huge fan of dill so I like to pack a generous amount into the jars. Adjust the quantity according to your preference. It takes a long time to extract the flavor from dill seeds and so those are better suited to pickle recipes for canning (like my Dill Pickle Relish) where the pickles are processed in boiling water and then sit to “mature” for a while.
- Garlic: I love garlic in my pickles, they add a nice earthy umami note that contrasts with the tanginess of the brine. If you don’t like or can’t eat garlic you can omit it.
- Spices: These refrigerator dill pickles really need nothing beyond fresh dill, garlic and black peppercorns. If you’d like some more complexity to the flavor profile you can use some Pickling Spice (this gourmet blend hits practically every flavor note) or just add some individual spices of your choice such as mustard seeds, whole cloves, coriander seeds, allspice and bay leaves. Like spicy pickles? Add some red pepper flakes or some diced jalapeño pepper.
- Salt: Use either kosher salt, pickling salt or sea salt. Avoid regular table salt as it usually has additives which will will react with the brine and turn your pickles an unpleasant grayish color.
- Sugar: This provides some balance to the sharpness of the vinegar. While it’s not necessary, I recommend it. You don’t need a lot and you can reduce the amount as desired. Or, if you like sweet pickles, you can increase the amount. You can also check out my recipes for Bread and Butter Pickles.
- Vinegar: I use and recommend standard white vinegar (5%). Alternatively you can use rice vinegar for a slightly more mellow flavor or apple cider vinegar for a slightly sweeter flavor.
Pickling Tips
Making homemade pickles couldn’t be easier. But there are a few important things to be mindful of that could cause some poor results if not observed:
- Use the freshest, firmest cucumbers you can find. Avoid ones that are soft, shriveled or bruised.
- When you’re working with high-acid foods, in this case vinegar, be sure to use cooking vessels that are made of nonreactive materials such as stainless steel or glass. Avoid pots that are made from reactive metals like cast iron, aluminum and copper because these will react with the acid and give your pickles a metallic flavor. For containers for storing your refrigerator pickles I avoid plastic, even “food grade” plastic, and recommend using glass jars.
- Use either kosher salt, pickling salt or sea salt. Avoid using regular table salt because it usually has additives in it and they will cause your pickles to turn an unpleasant grayish color.
- Cool the brine to room temperature before you pour it over the cucumbers to ensure the pickles are nice and crisp. Some recipes call for pouring the boiling brine over the cucumbers but that will result in softer pickles. It’s really a matter of personal preference, but if you like your pickles nice and crunchy let the brine come to room temp first. If you do choose to pour boiling brine over them I recommend using a product like Pickle Crisp which will help the pickles retain more of their crunch.
Follow these steps and you’re on your way to enjoying beautifully and deliciously crisp and refreshing homemade refrigerator pickles!
Refrigerator Pickles Recipe
Let’s get started!
First prepare the brine. See the note about using hot brine versus cooled brine for making refrigerator pickles in the “Pickling Tips” section above. Place the brine ingredients in a pot and bring it to a boil. Once the salt and sugar are dissolved, turn the stove off and let the brine sit until it has cooled to room temperature.
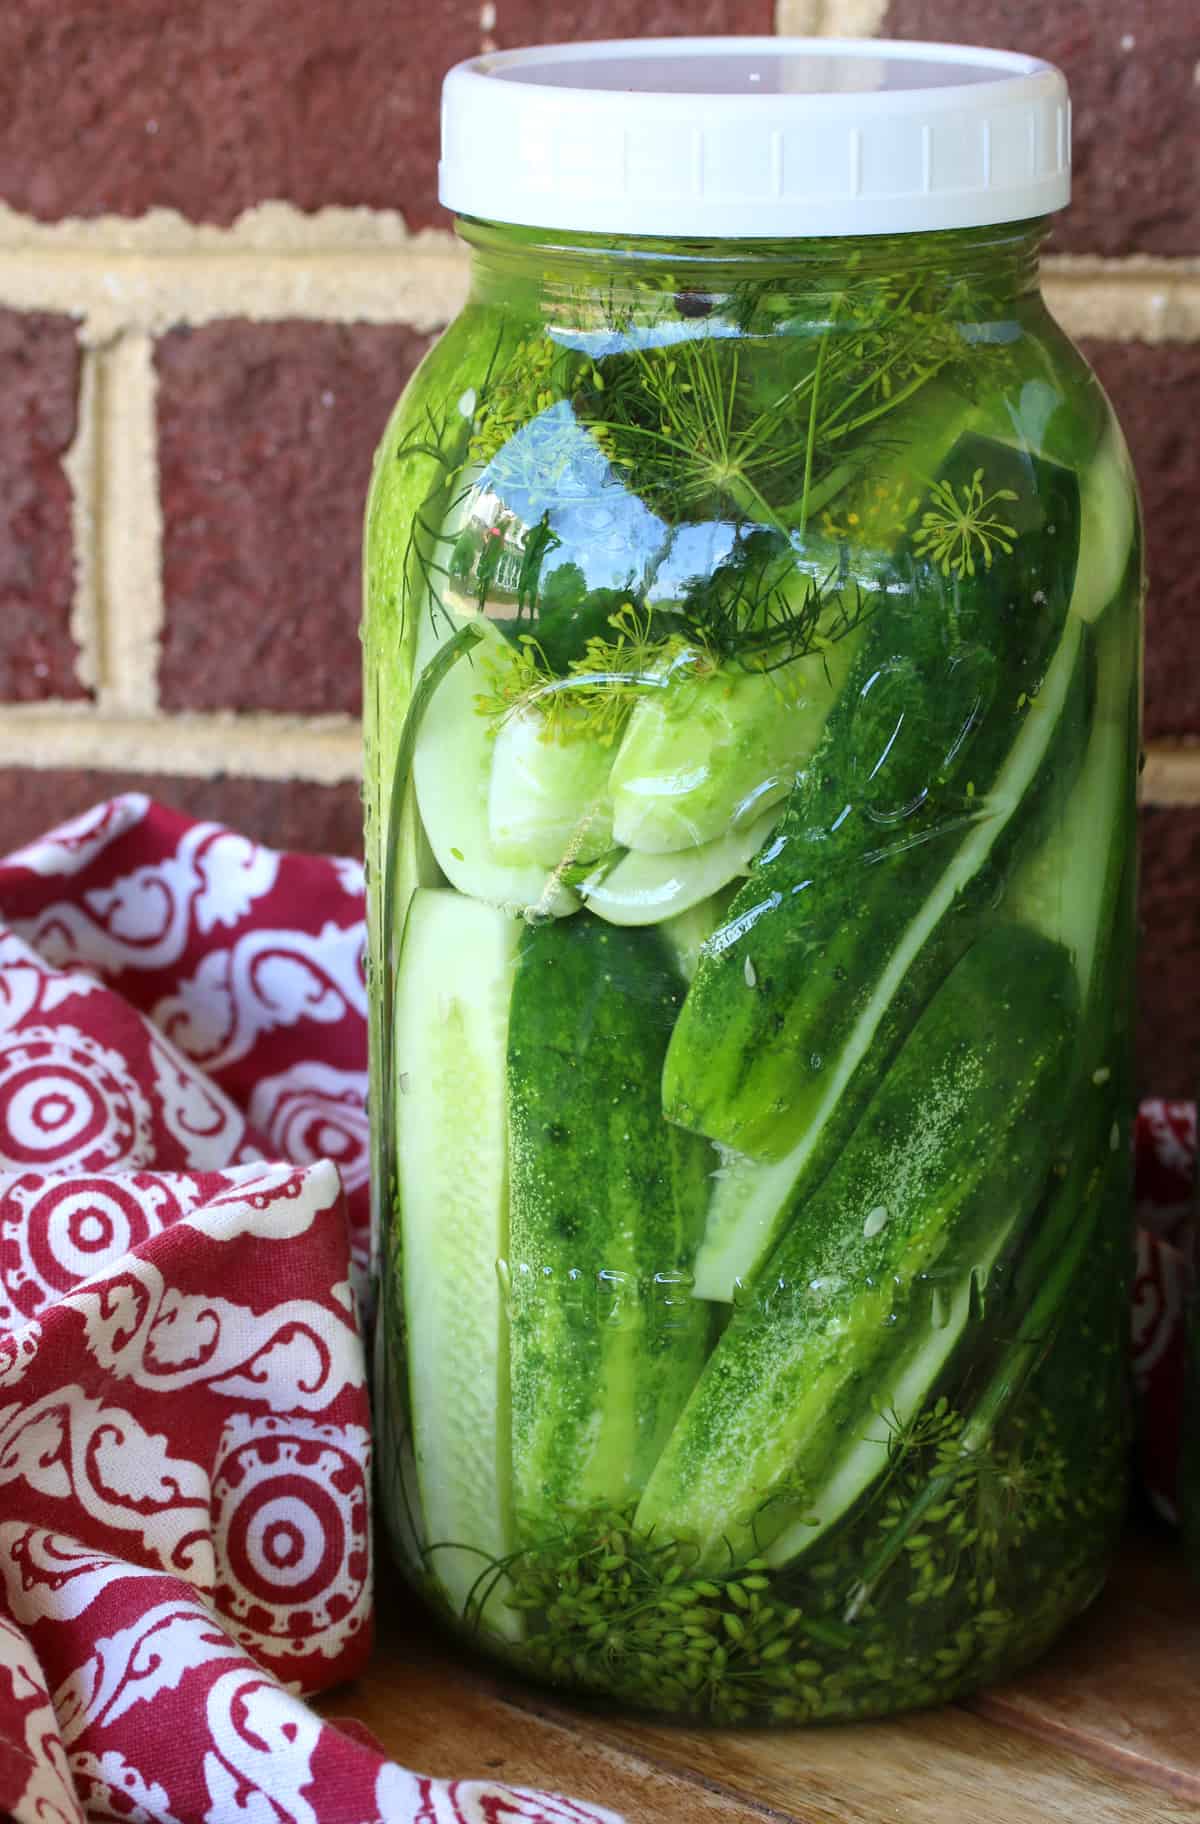
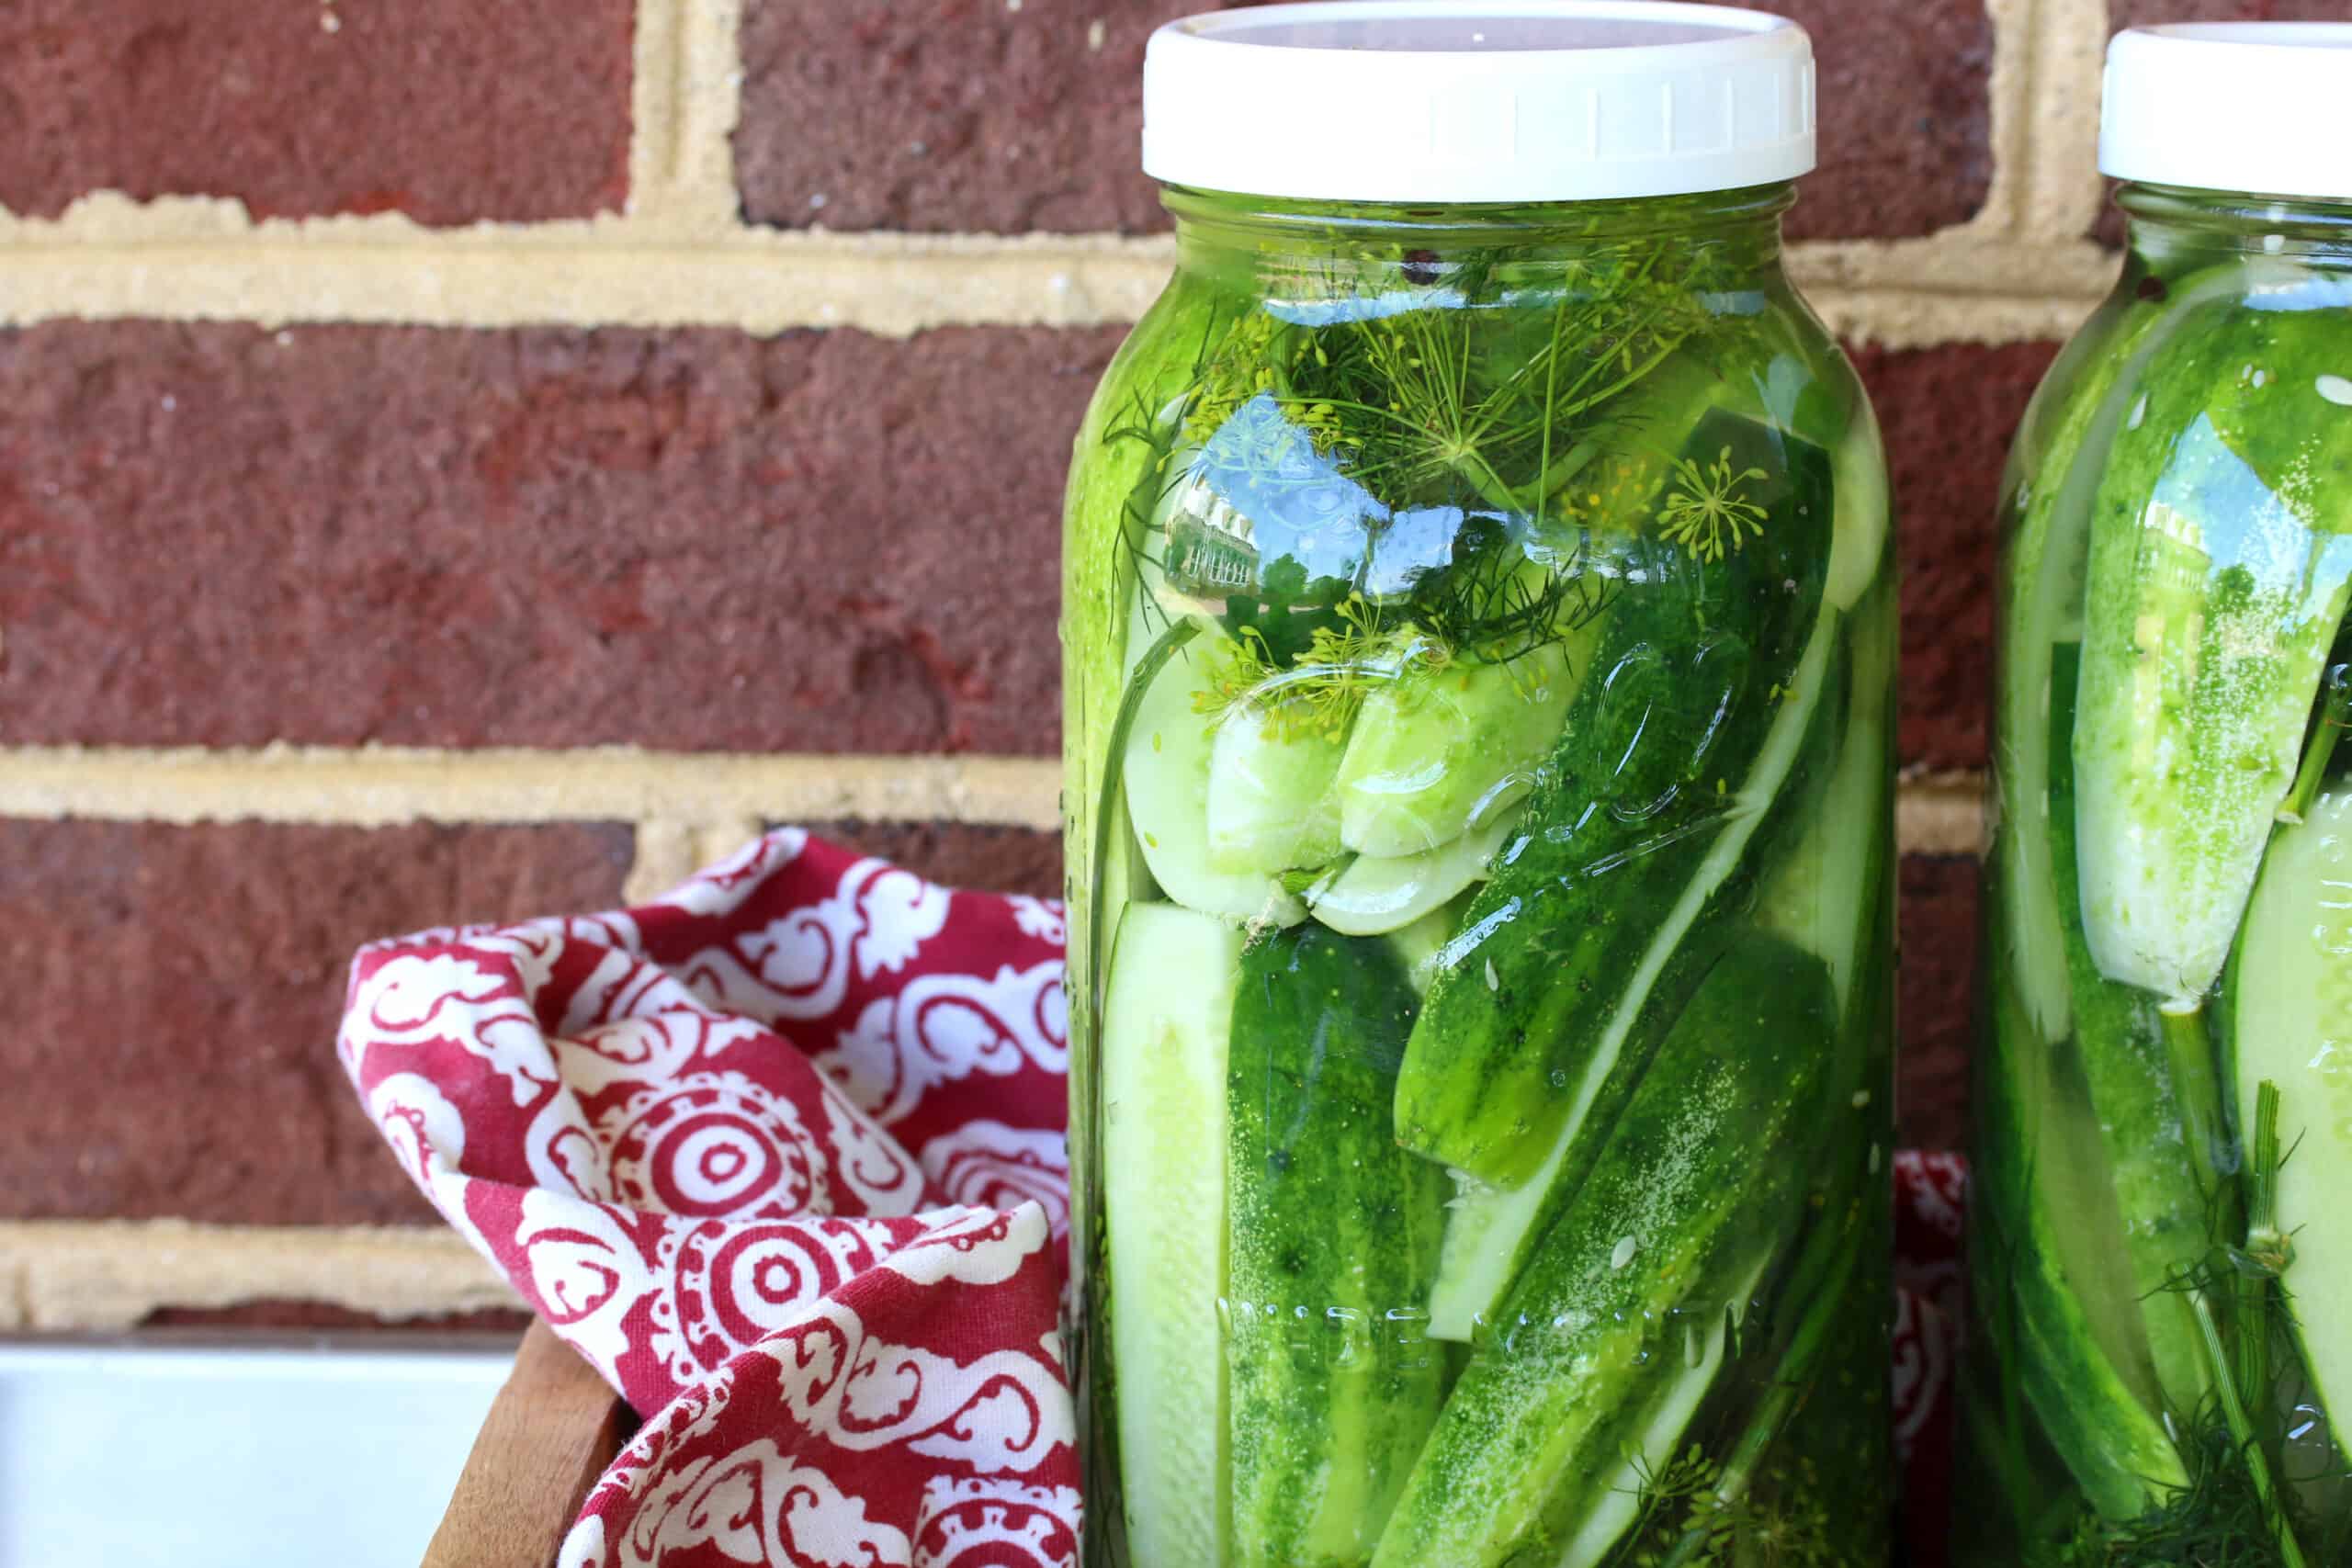
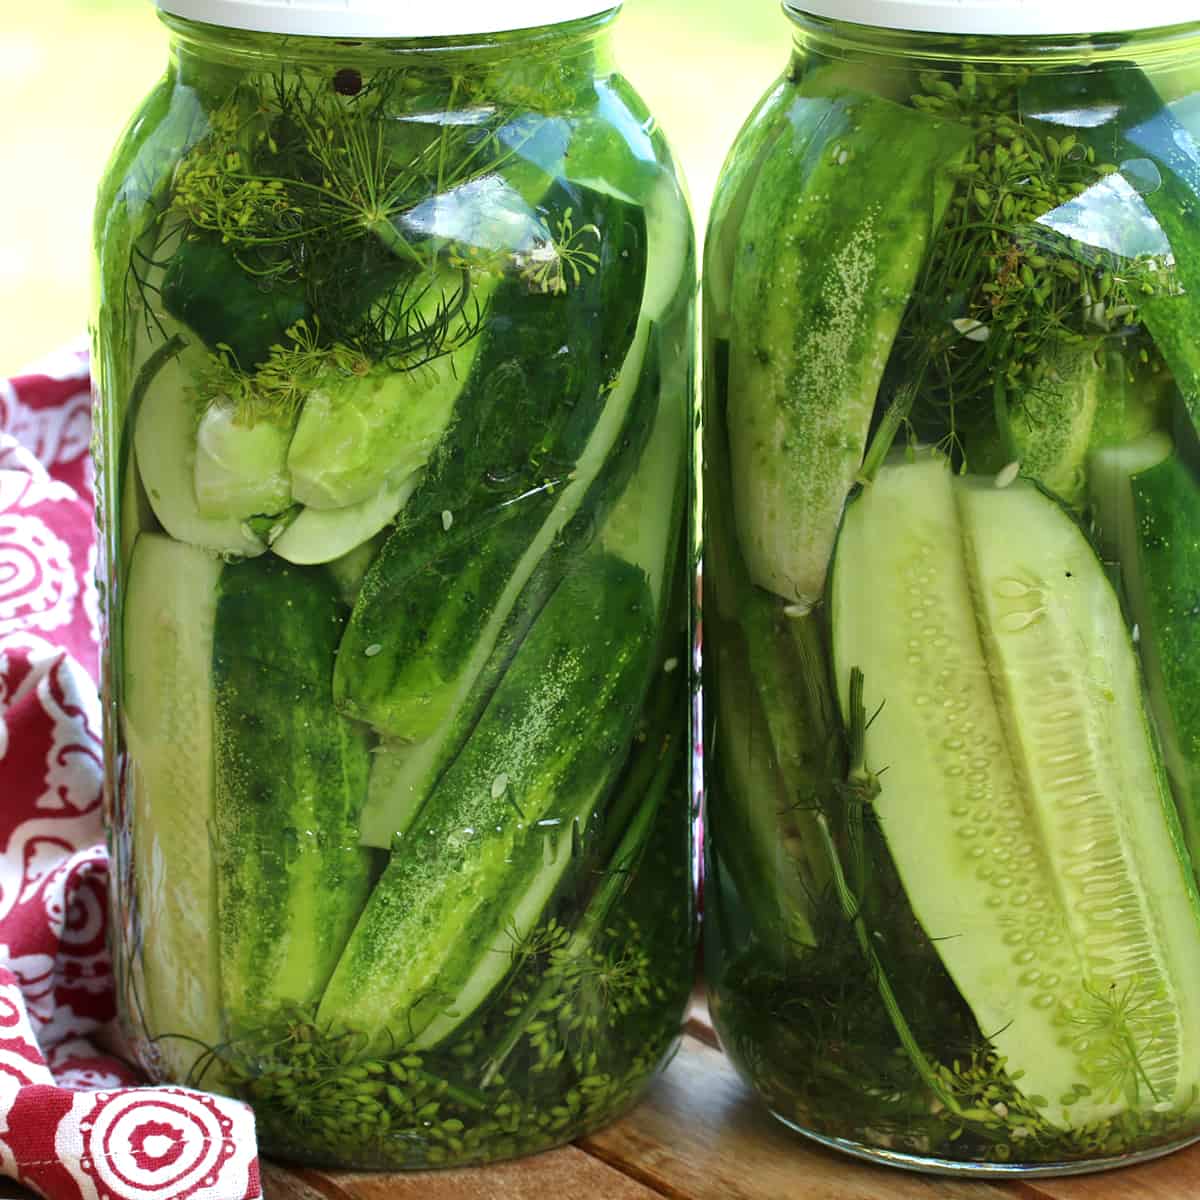
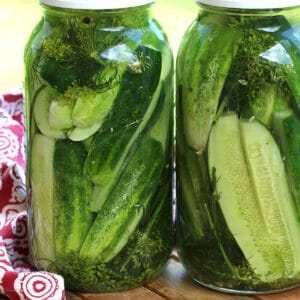
Next prepare the cucumbers. Depending on the size, cut them into halves or quarters to make spears. Or if you prefer, you can slice them into rounds (1/8 to 1/4 inch thick). Place roughly half of the dill and garlic into the bottom of each 1-quart jar (wide mouth jars with large openings are best for getting the pickles in and out).
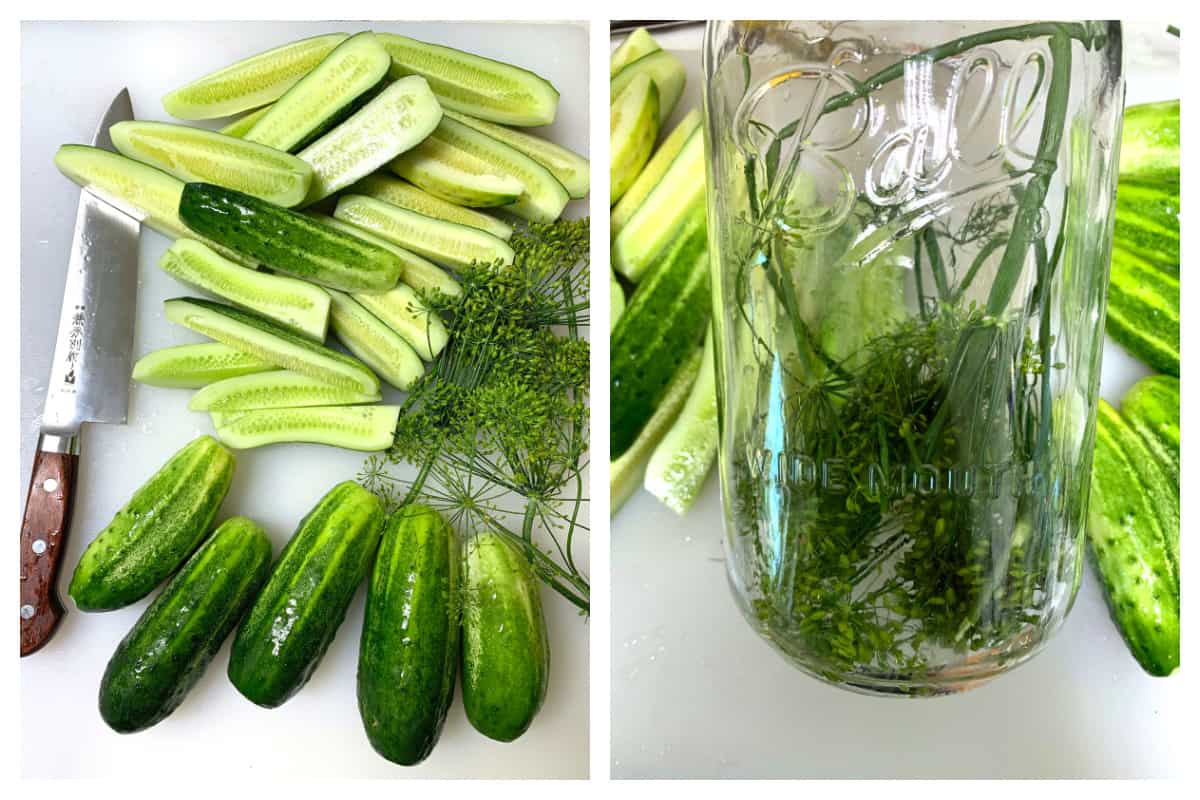
Pack the cucumbers into the jars (you can add some onion if you like), packing them in as firmly as you can. Stuff in the remaining dill and garlic.
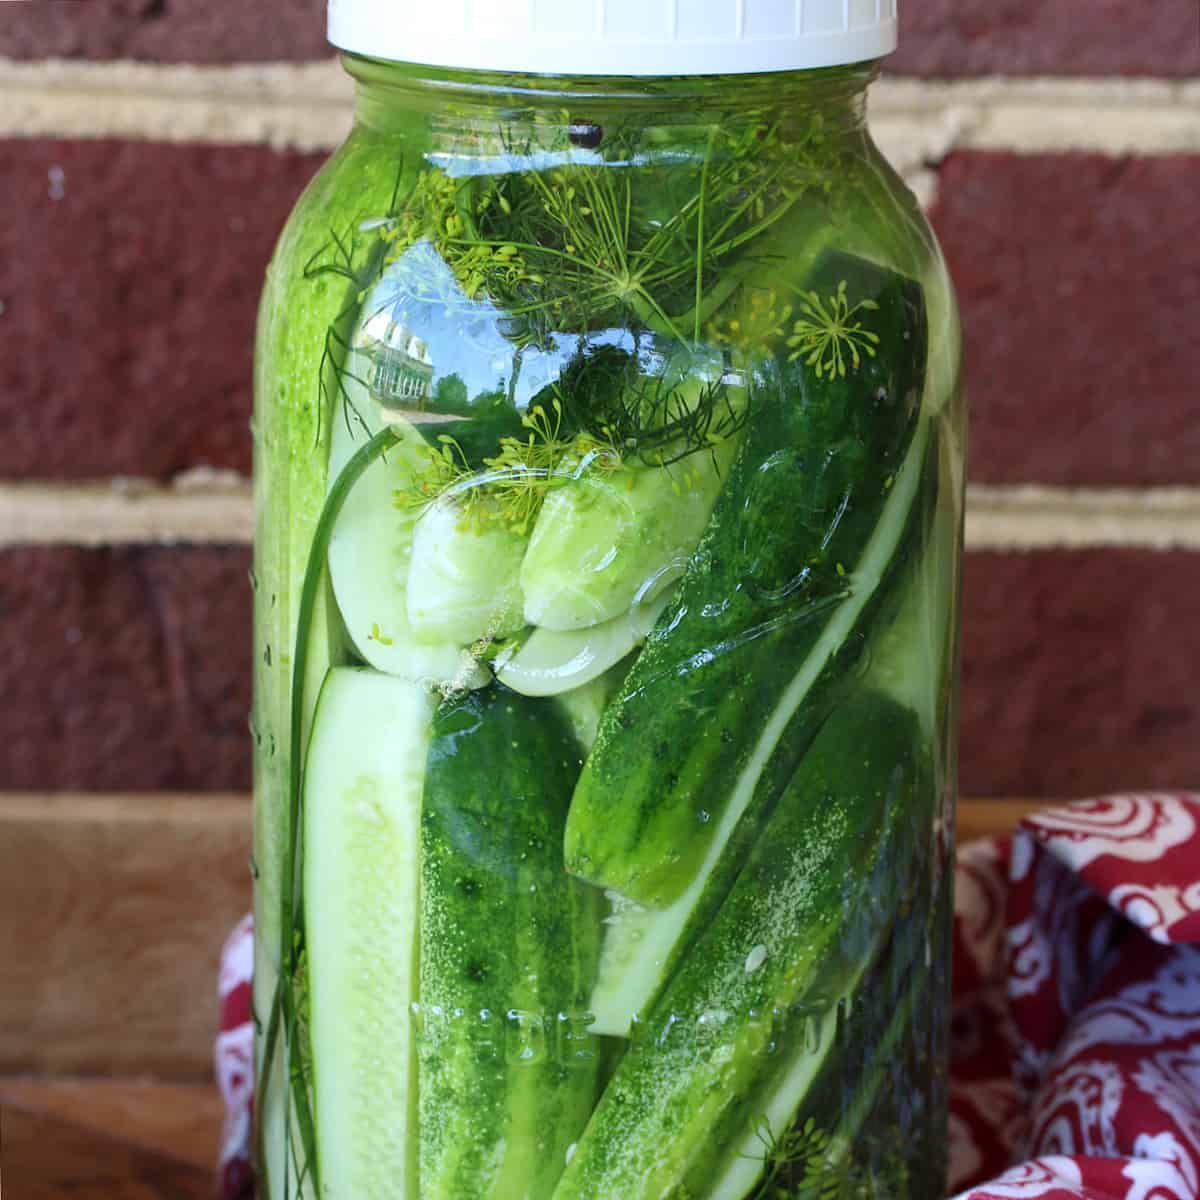
Once the brine is roughly room temperature (it can be a little warmer or chilled), pour it over the pickles into the jars (try to divide the peppercorns between the two jars). You want to make sure the pickles are fully covered. If you find you don’t have enough brine, you can more equal parts of vinegar and water.
Screw on the lids and if they’re fully cooled, chill them in the refrigerator. For best results wait at least 24 hours before eating. They will keep in the fridge for up to a month. Just be sure the pickles are always immersed under the brine.

Ways to Enjoy Them
First and foremost, you pull them out of the jar and immediately chomp into them! But beyond fresh snacking here are some additional ways you can put these crispy, juicy, tangy pickles to use:
- Diced up and added to salads like classic potato salad, Olivier salad, macaroni salad and other pasta salads, tuna salad, ham salad and Swiss Wurstsalat or German Fleischsalat.
- Sliced and added to burgers, wraps, sandwiches and Cuban sliders.
- On cheeseburger pizza or cheeseburger nachos.
- Pastrami or ham roll-ups: spread slices of pastrami or ham with cream cheese, lay a pickle on it and roll it up, then slice into 1 inch pieces and serve with toothpicks.
- Finely minced and used as a fresh dill relish.
- Sliced, breaded and fried for fried pickles.
- Use to make dill pickle soup (you’d better believe it’s a thing!) and other soups calling for pickles like Solyanka.
Enjoy!
For more pickled favorites be sure to try my:
Refrigerator Pickles
These refrigerator pickles are easy to make, requiring no special equipment, and are ready for eating in a day!
- For the Brine:
- 2 cups distilled white vinegar (5%)
- 2 cups water
- 1/4-1/3 cup granulated sugar (start with 1/4 cup, taste the brine, and decide if you’d like to increase it)
- 3 tablespoons kosher salt or pickling salt
- 1 tablespoon black peppercorns
- For the Pickles:
- 2 pounds pickling cucumbers , e.g. Kirby, mini Persian or other small cucumbers; washed and cut into halves or quartered into spears
- 1 large bunch dill , if in doubt use more! (can use a combination of heads, leaves and stems), rinsed
- 6 cloves garlic , peeled and cut in half (optional)
Place the brine ingredients in a pot and bring it to a boil. Once the salt and sugar are dissolved, turn the stove off and let the brine sit until it has cooled to room temperature see note below about using boiling versus cooled brine).
- Place roughly half of the dill and garlic into the bottom of each 1-quart jar. Pack the cucumbers into the jars (you can also add some sliced yellow or sweet onion if you like), packing them in as firmly as you can. Stuff in the remaining dill and garlic.Once the brine is roughly room temperature (it can be a little warmer or chilled), pour it over the pickles into the jars (try to divide the peppercorns between the two jars). You want to make sure the pickles are fully covered. If you find you don’t have enough brine, you can more equal parts of vinegar and water.Screw on the lids and if they’re fully cooled, chill them in the refrigerator. For best results wait at least 24 hours before eating. They will keep in the fridge for up to a month. Just be sure the pickles are always immersed under the brine.
Using Boiling vs Cooled Brine: Some recipes call for pouring the boiling brine over the cucumbers but that will result in softer pickles. It’s really a matter of personal preference, but if you like your pickles nice and crunchy let the brine come to room temp first. If you do choose to pour boiling brine over them I recommend using a product like Pickle Crisp which will help the pickles retain more of their crunch.
Calories: 14kcalCarbohydrates: 3gProtein: 0.3gFat: 0.1gSaturated Fat: 0.01gPolyunsaturated Fat: 0.01gMonounsaturated Fat: 0.004gSodium: 656mgPotassium: 48mgFiber: 0.3gSugar: 2gVitamin A: 25IUVitamin C: 1mgCalcium: 9mgIron: 0.1mg
SaveSaved!

Hi, I’m Kimberly Killebrew and welcome to Daring Gourmet where you’ll find delicious originals, revitalized classics, and simply downright good eats from around the world! Originally from Germany, later raised in England, world-traveled, and now living in the U.S., from my globally-influenced kitchen I invite you to tour the world through your taste buds!
Read more about me…
www.daringgourmet.com (Article Sourced Website)
#Refrigerator #Pickles