If you’ve ever contoured your cheeks, lips or nose, you know the power the technique can wield, but how does it translate to your nails? Much like makeup contouring, nail contouring is all about strategic color placement, says professional nail artist Anouk Nijs. When done well, the nail stops looking flat and instead appears longer, slimmer and more refined—without adding any actual length—according to professional nail artist Valeriia Telemaniuk. “Nail contouring is architecture. It doesn’t add millimeters; it reshapes perception.”
“Nail polish contouring isn’t about where the polish ends. It’s about how the eye moves,” says Telemaniuk. “At its core, contouring is a visual technique built on direction, light and proportion. It’s created through thoughtful design, color choice and composition: when lines stretch lengthwise, when light flows from the cuticle toward the free edge and when the eye is guided along the nail instead of stopping at its borders.” Below, we break down how nail contouring works—and why it’s such an effective optical illusion.
Featured Experts
What Is Nail Polish Contouring?
“Nail polish contouring is basically the art of tricking the eye with polish. Just like contouring with makeup helps highlight your cheekbones or slim your nose, this technique uses different shades of polish to reshape how your nails look,” explains professional nail artist Sofiia Mazur.
The power of nail contouring can go beyond making short nails look longer. By playing with light and shadow, you can also make wide nails look slimmer or even correct uneven shapes, says Mazur. “Think of it as a tiny illusion that lives right on your fingertips.” She adds, “With a steady hand, patience and a bit of experimentation, nail polish contouring can turn your everyday manicure into a little optical illusion that perfectly elongates your nail beds!”
What makes nail contouring so fun is how creative you can get with it, says Mazur. “You might use a darker tone along the edges and a lighter one in the center, or add a subtle gradient that naturally elongates the nail. It’s less about perfection and more about understanding how color flows with shape and light.”
Tips for Nail Contouring at Home
Cuticle Care
Telemaniuk says contouring starts with nail and cuticle care. Post-shower, while the skin is softer, use an orange wood stick to carefully push back the cuticle, then apply moisturizing oil, instructs Telemaniuk. “This alone changes how the nail is visually perceived.”
Color Choice
Your color choices are key to contouring. “Milky, sheer and natural gel polish shades play a major role in visual elongation. These tones reflect light softly, blur harsh boundaries and create the illusion of a longer, continuous nail bed. That’s why nude and milky manicures often make nails look longer and more elegant, even without a complex design,” says Telemaniuk.
Mazur agrees nude or blush tones close to your skin color create a seamless effect that makes nails look longer, but if you want to have a bit more fun, you can do a clear base with a bolder color on top. You could even add “some glitter, as it will reflect the light even brighter, so your nail beds will look longer without trying so hard!”
Add Art, But Keep It Simple
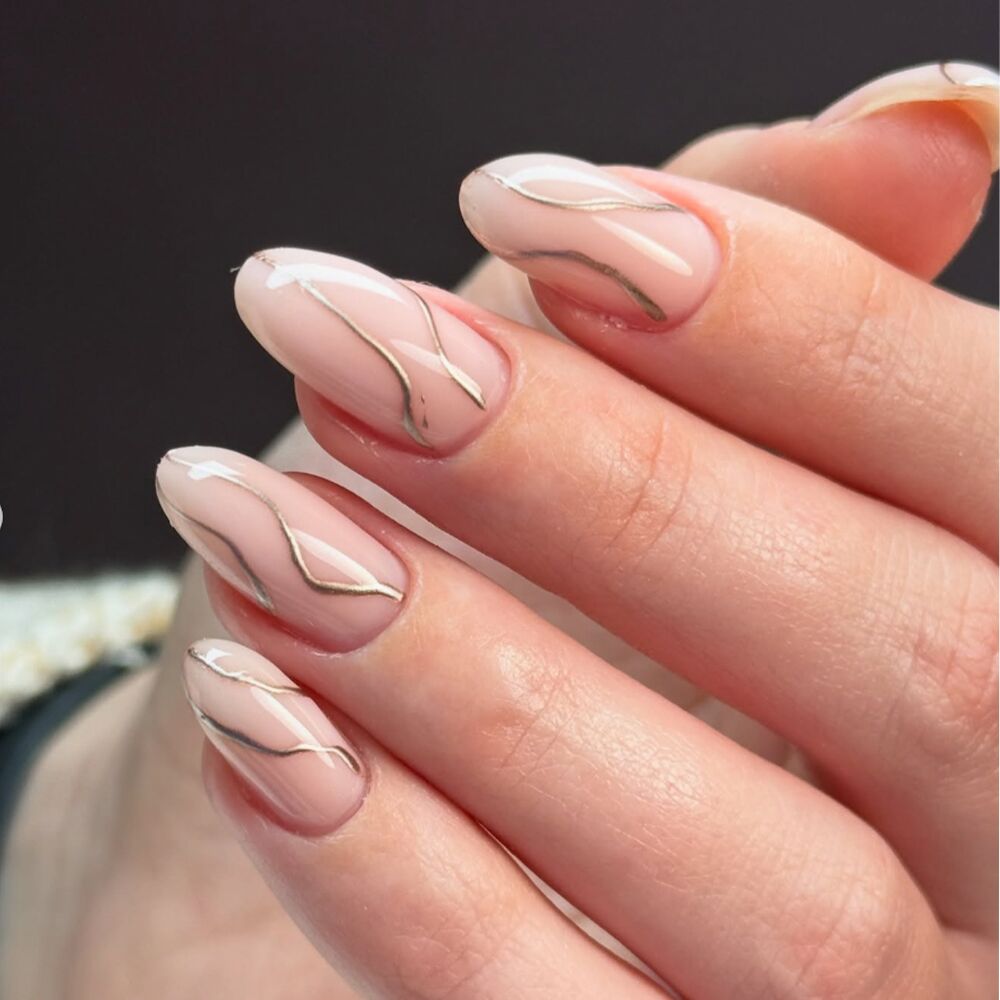
“Design is one of the strongest contouring tools. Elongated vertical lines, narrow central accents, lengthwise gradients and optical designs all create movement and movement creates length,” says Telemaniuk. “Even a single, well-placed vertical line can visually change nail proportions more than an intricate design spread across the entire surface.”
Nijs says the easiest way to contour your nails at home is to paint a slightly narrower strip of color down the center of the nail. “Leaving a millimeter or two along the edges bare creates a natural elongating effect,” she explains. “In contouring, direction matters more than decoration. It’s about guiding the eye, not overwhelming it,” says Telemaniuk, so a simple vertical line might be your best bet as a beginner.
Play With Light and Dark
Mazur says the secret is to work with light and shadow just like you would when contouring your face. “Start by choosing two shades of polish from the same color family—one slightly darker and one lighter. Apply the lighter color as a background, and use the darker color in the center to visually create a longer nail bed. This gives the illusion of slimmer, more elongated nails,” she explains. You can blend the transition between the colors with a fine brush or makeup sponge to make it look natural and smooth, says Mazur. She notes the key here is subtlety, so avoid overdoing the contrast or creating heavy lines.
Negative Space
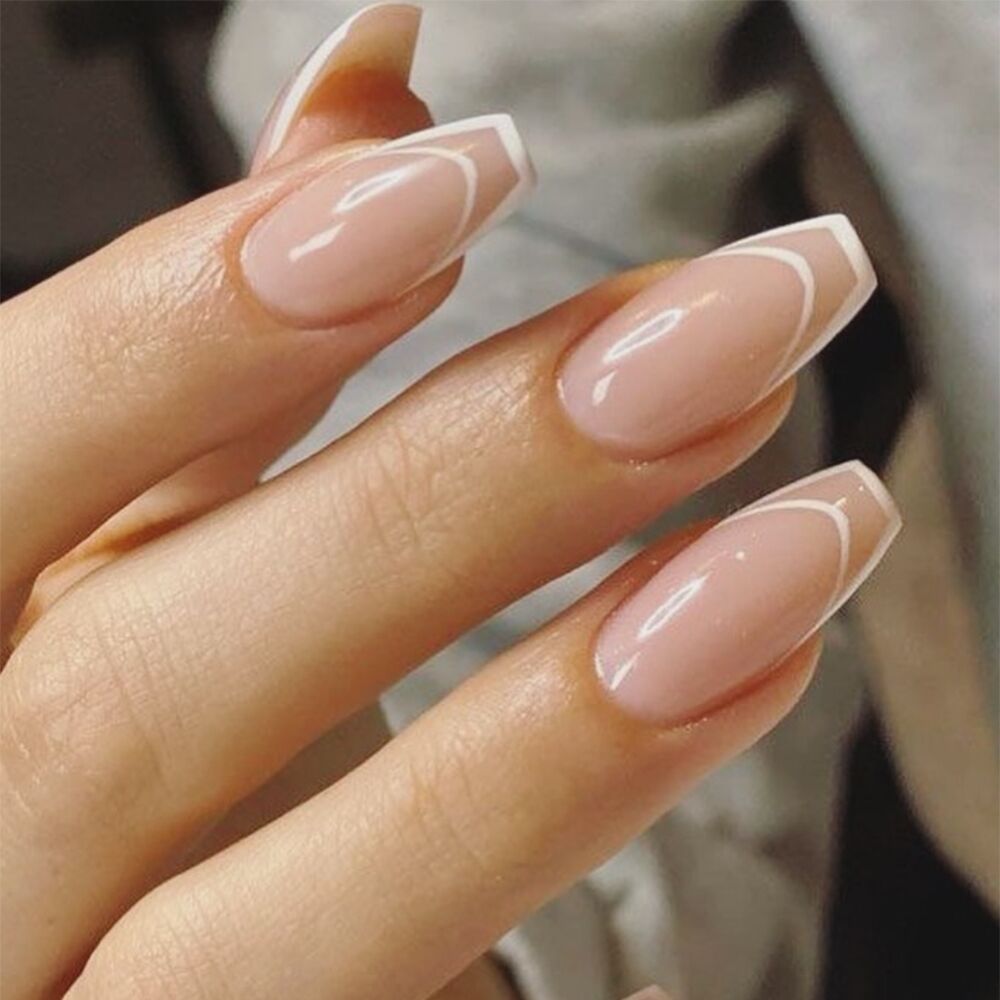
One of the top techniques for contouring nails is keeping the center lighter, says Nijs. “For extra dimension, add a darker shade along the sides or a lighter one in the center using a thin brush. Think: negative space manicures and Frenchies.
Add a Highlight
“If you want a little extra detail, use a fine liner brush to add a vertical highlight or shimmer line down the center,” suggests Mazur. “It will catch the light and make the nail look even longer.”
Be Precise
“Crisp, clean edges are key,” says Nijs. “They sharpen the illusion and make the polish look professionally done.” So be sure to go slowly and create precise, clean lines.
Cat-Eye Contouring
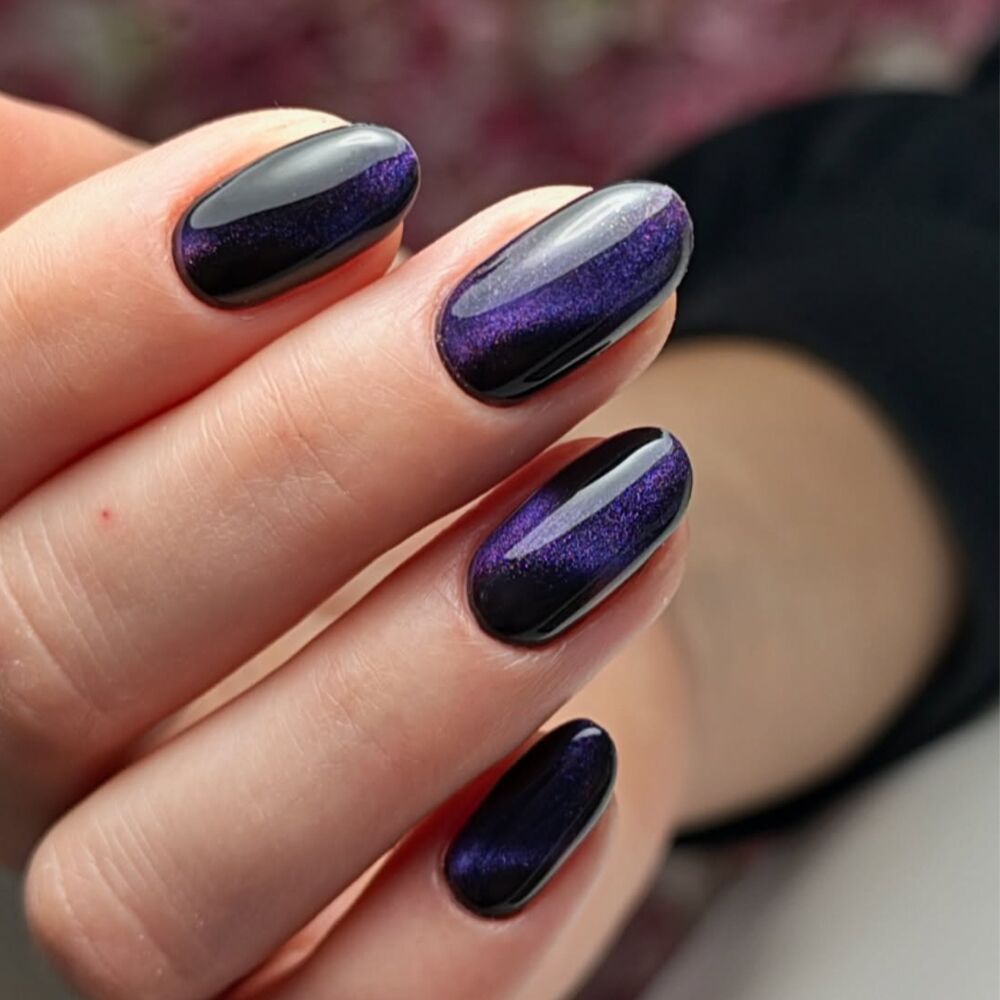
“Cat-eye polish is one of the most powerful contouring techniques because it works with light. The magnetic particles in cat-eye formulas allow us to control reflection,” explains Telemaniuk. “By concentrating the shimmer in the center of the nail, we create a glowing vertical axis. The eye naturally follows that light, making the nail appear longer, deeper and more sculpted. It’s almost like a beam of light running through the nail.” She says this effect can be especially transformative for shorter or natural nails, dramatically changing visual proportions without adding any heaviness.
www.newbeauty.com (Article Sourced Website)
#Nail #Contouring #Trick #LongerLooking #Nails