Have you ever stood in your backyard, gazing at a spot that’s crying out for a new path, patio, or garden feature? Perhaps you’ve wondered if you can tackle concrete work on your own without too much hassle. If so, mini mix concrete might be just what you need. It’s a brilliant way to create cost-effective outdoor areas, and it can be surprisingly easy once you know the basic steps.
We’ll begin by discussing what mini mix concrete actually is and why it’s so popular among avid DIY-ers. Then, we’ll move on to the best strategies for planning and pouring your own small-scale concrete project, complete with tips on calculating quantities, selecting tools, and avoiding common pitfalls.
Whether you’re looking to add a new garden path, lay a sturdy slab for a shed, or add flair to your outdoor entertaining area, this guide will walk you through the process step by step. Let’s dive right in and discover how mini mix concrete can transform your home projects.
Planning Your DIY Mini Mix Concrete Project
Before you get stuck into any home renovation, it’s critical to sort out the details, gather equipment, and make sure you understand what’s involved. Taking a moment to plan thoroughly can save you heaps of trouble later on.
Determining Project Scope and Requirements
Start by identifying what you want to achieve. Are you laying a new garage floor, building a small ramp, or upgrading a path? Each plan requires a slightly different approach. If you know the scope, you can work out if you’ll need special techniques such as reinforcing steel or expansion joints. That also makes it easier to budget, since you’ll have an accurate idea of how much mini mix concrete you’ll require.
Tools and Equipment Checklist
At a minimum, you’ll need measuring tools, a wheelbarrow, and a shovel to move your mini mix concrete around. You’ll also want a concrete mixer if you’re working with bagged material—although pre-mixed deliveries can eliminate that step. A straight-edged piece of timber or a screed helps level the surface, while a bull float or steel trowel gives you a smooth finish. Don’t forget that you might need some timber boards for formwork to shape your concrete area.
Safety Gear and Preparations
Concrete may look harmless, but fresh concrete and cement powder can irritate your skin and eyes. So, make sure that you protect yourself with gloves, safety glasses, and a mask if you’re dealing with cement dust. Checking the weather forecast can also be a life-saver. Strong winds or intense heat can affect the curing process, and rain can spoil freshly poured concrete. Aim for a mild, dry day to keep things simple.
Common Pitfalls to Avoid
One big pitfall is forgetting to prepare the ground beneath the concrete. If the base is too soft or uneven, your slab might shift later or develop cracks. Another is rushing the pouring process, which leads to lumps or poor compaction. Also, watch out for not ordering enough concrete the first time around—nothing’s worse than running out halfway through a pour. Taking the time to map out every step helps you dodge these issues.
Step-by-Step Guide to Pouring Mini Mix Concrete
Once your planning is done, it’s time to begin. Follow these steps to get your concrete poured smoothly and effectively. Remember to take your time and pay attention to each phase.
Site Preparation
First things first: get your site ready. Clear away any grass, weeds, or debris, and ensure that the ground is stable. If necessary, lay down a compacted gravel base to keep the concrete from sinking over time. Next, use timber boards or formwork to create a mould for your slab or path. Double-check your measurements and confirm that the formwork is securely pinned in place.
Mixing Techniques for Mini Mix Concrete
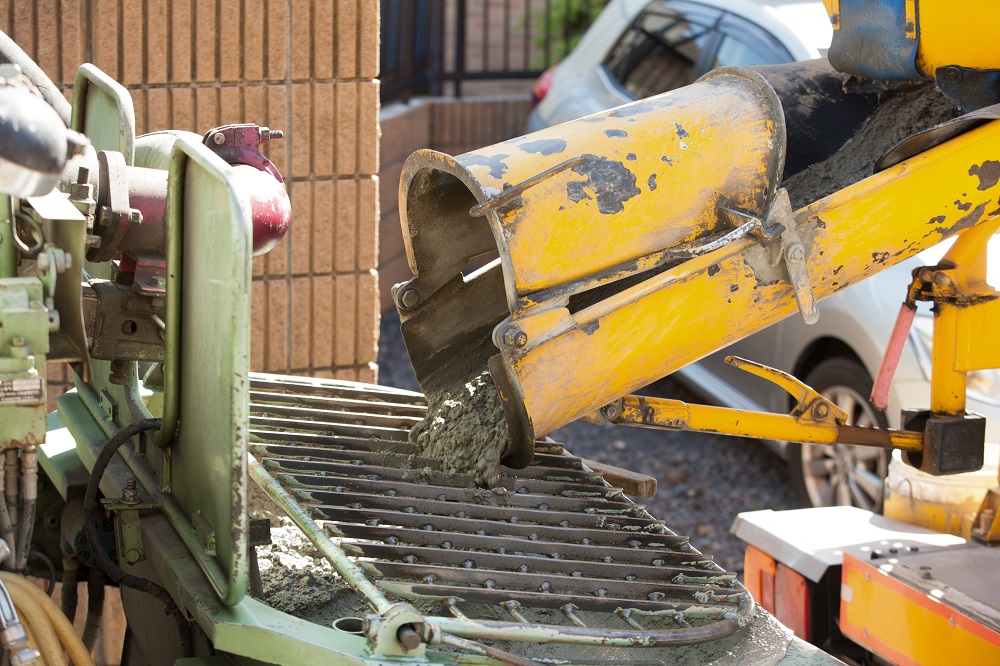
Many homeowners order mini mix concrete directly from suppliers in Melbourne, which arrives pre-blended and ready to pour. That’s one reason it’s called “mini mix”—it’s offered in smaller loads suitable for smaller projects. Alternatively, you can mix bagged cement and aggregates in a concrete mixer or even by hand if you’re only doing a tiny area. Aim for a consistency that’s neither too watery nor too dry. A sloppy mix can weaken the final result, while a stiff mix can be tough to work with.
Pouring and Spreading
With your site prepped and concrete on hand, begin pouring from one corner and work your way across. Move the concrete into place using a shovel or rake, aiming to fill every nook and cranny. Try to keep the pour as continuous as possible, since stopping for too long can cause weak spots or lines in the finished slab.
Levelling and Compacting
Next, level the surface with your screed or a straight-edged piece of timber. Rest the screed on the formwork and pull it across the concrete in a back-and-forth motion. This helps spread the material evenly and pushes out air bubbles. For larger slabs, use a concrete vibrator or tamping tool to consolidate the mix and reduce air pockets. This step is vital for preventing cavities that might compromise the slab’s strength.
Finishing Touches
Once levelled, let the concrete settle for a short while. Then, use a bull float to smooth out the surface and close any pores on top. If you prefer a non-slip finish, you can broom the surface gently or sprinkle decorative aggregates for a stylish look. Finally, keep an eye on the concrete as it starts to firm up. Depending on the weather, you might need to mist the surface with water or use a curing compound to keep it from drying out too fast.
Cost and Supplier Considerations
Cost often comes up as a major factor for homeowners. Luckily, if you plan well and compare suppliers, you can find cost-effective ways to pour your mini mix concrete.
Comparing Quotes and Delivery Options
When searching for mini mix concrete quotes, gather pricing from at least two or three different suppliers. Ask about extra fees, such as weekend surcharges or small-load charges that might pop up if you’re ordering below a certain volume. Check how far the supplier travels and whether they offer same-day delivery. Make sure that you ask about any waiting time fees, especially if your site setup might cause delays when offloading.
Budget-Friendly Approaches for DIY Projects
One cost-saving tactic involves batching your projects. If you have multiple small areas to concrete, aim to pour them all in the same delivery rather than placing separate orders. You can also reduce costs by prepping all formwork and base layers yourself, and then just having a professional help with labour on pour day. Finally, compare the price difference between bagged concrete mix and having mini mix delivered. One approach might be cheaper than the other, depending on your scale.
Maintenance and Long-Term Care
Once your new concrete surface is in place, you’ll want to look after it to ensure that it lasts as long as possible. Regular attention can ward off serious issues down the line.
Sealing and Weatherproofing
Sealing helps protect the concrete from moisture, grime, and general wear. Once your slab is fully cured—often after around 28 days—you can apply a high-quality sealer or weatherproof coating. That added layer of protection keeps water from penetrating into the slab, which reduces the chance of cracks caused by freezing and thawing in cooler regions. In Melbourne’s climate, sealing is still a smart choice, especially for driveways and outdoor entertaining areas.
Decorative Options and Upgrades
Concrete surfaces don’t have to be a dull grey. You can experiment with coloured concrete, exposed aggregate, or stamped patterns to add a unique look. Over time, you might give your slab a facelift with stencilled designs or special finishes that keep it looking modern. Any of these decorative elements can be applied much like regular finishing, but be sure you do your homework first. Some decorative treatments require specific timing or techniques.
Ongoing Maintenance Tips
Regular sweeping and occasional pressure washing can keep concrete looking fresh. If you spot any stains, address them quickly to prevent permanent discolouration. It’s also important to keep an eye out for cracks or worn edges. Minor cracks can expand if they’re ignored, so seal them early using a concrete patch product or specialist sealant. With a bit of routine care, your mini mix concrete project can stand the test of time.
Conclusion
After exploring the ins and outs of mini mix concrete, you’re now armed with the knowledge to handle small-scale pours confidently. We’ve looked at how to plan your project, calculate your concrete requirements, and create a stable surface that won’t crumble under pressure. From selecting the right supplier to choosing when and how to seal your finished slab, every detail contributes to a satisfying end product.
Pouring mini mix concrete can feel daunting at first, but practice makes perfect. Even if you’re a complete beginner, simple steps like thorough site preparation, cautious mixing, and proper finishing can make all the difference.
Ultimately, if you’re after a durable, cost-effective way to add new life to your outdoor area, mini mix concrete is a brilliant choice. With the tips shared in this post, you’ll be ready to roll up your sleeves and create lasting improvements around your home.
theblueridgegal.com (Article Sourced Website)
#HowTo #Pour #Mini #Mix #Concrete #DIY #Home #Projects