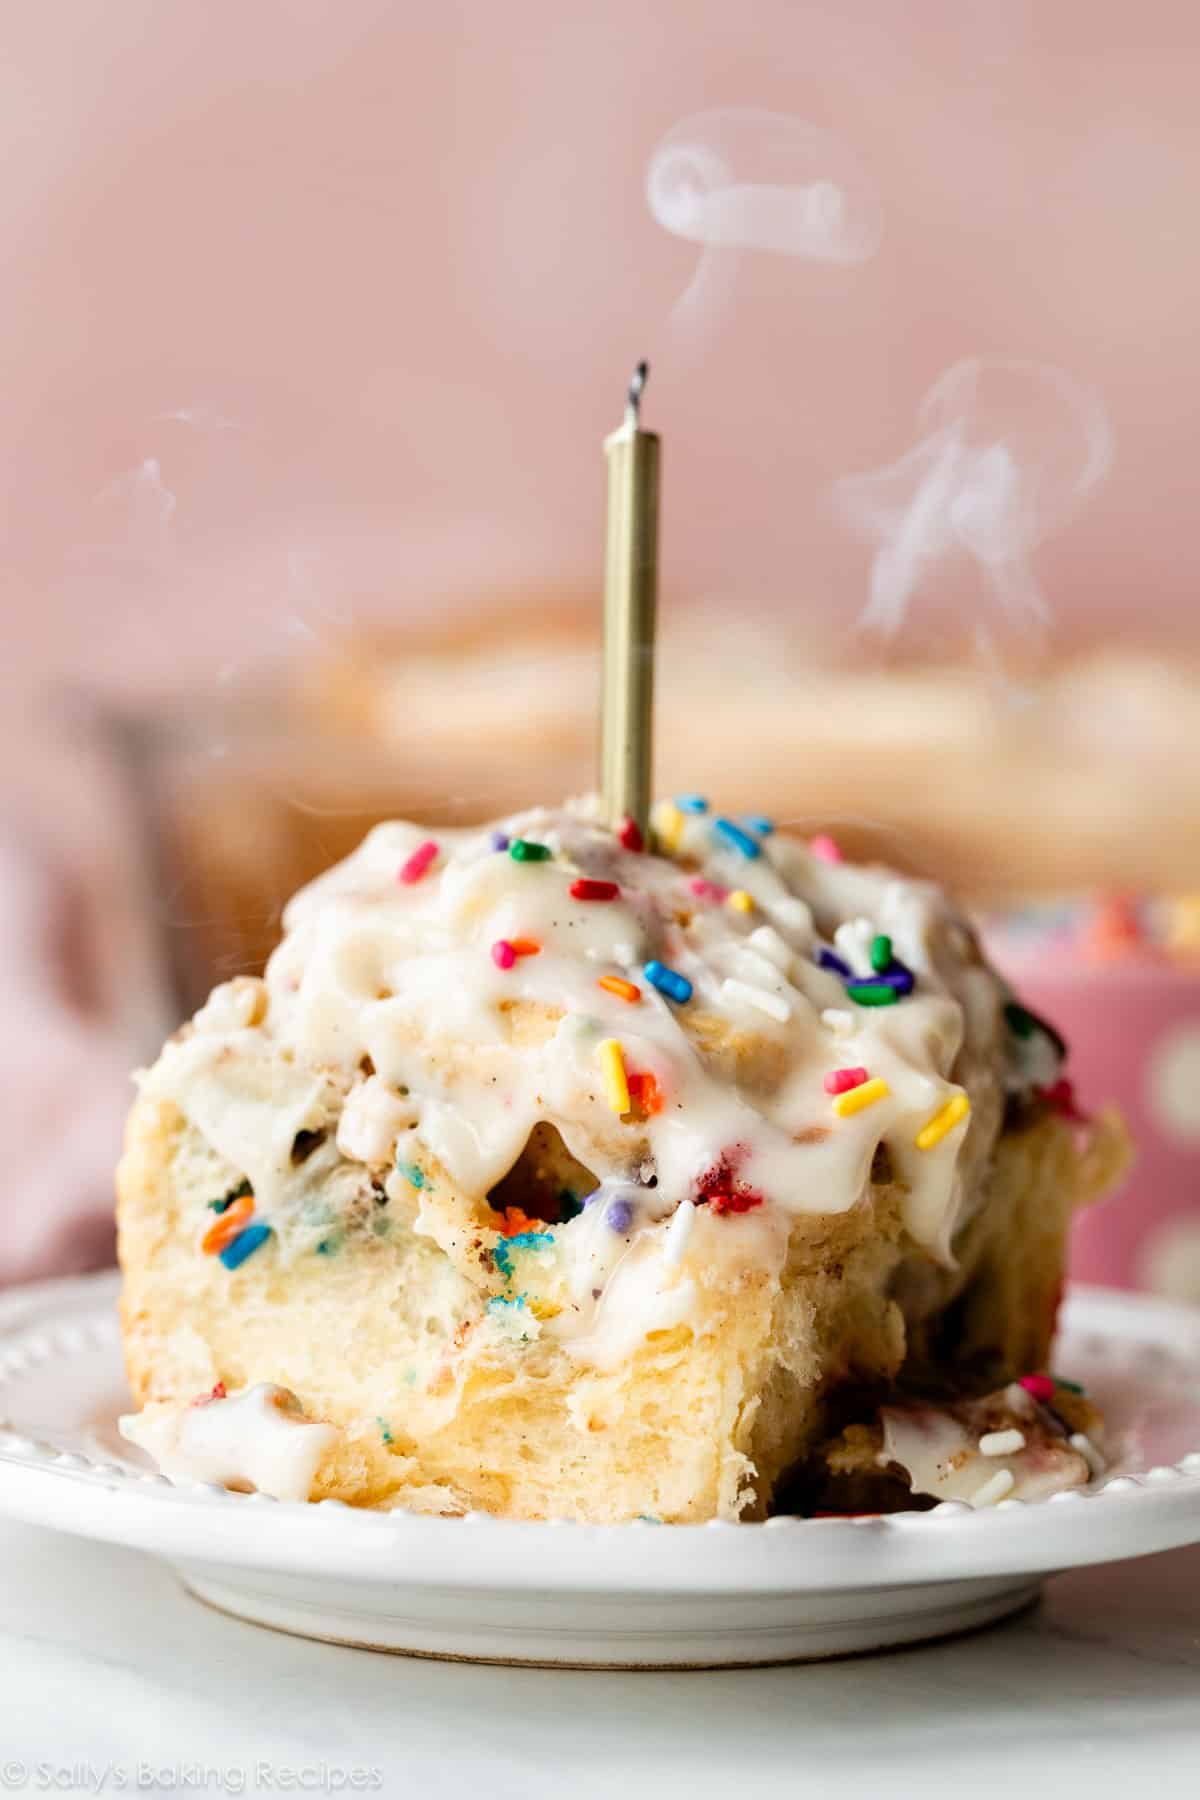
Make someone’s birthday wishes come true by waking them up with these extra soft & sprinkle-loaded birthday cake cinnamon rolls. Like a cross between cinnamon rolls and confetti cake, this extra-special breakfast treat is perfect for kicking off an extra-special day. Top with vanilla or cream cheese icing, and don’t forget the birthday candle!
*Wishes for a second helping.*

Like a sprinkle-loaded stack of birthday cake pancakes, these Funfetti cake-inspired rolls are the happiest treat on your special morning. I published this recipe way back in 2013, and make them a few times each year when a family birthday rolls around. And, on several occasions, I’ve made these INSTEAD of birthday cake, because… honestly… cinnamon rolls for dessert just makes sense.
And some people just don’t like cake. Yes, I know you’re out there!
I’ve made very few edits to the original recipe (because it’s just so good), but I do have new photos and streamlined instructions for you here.
You’ll Love These Birthday Cake Cinnamon Rolls
- Filling tastes like cake mix, but it’s not from a box
- Fluffy, buttery, and tender dough
- Loaded with colorful rainbow sprinkles, like a batch of confetti cupcakes
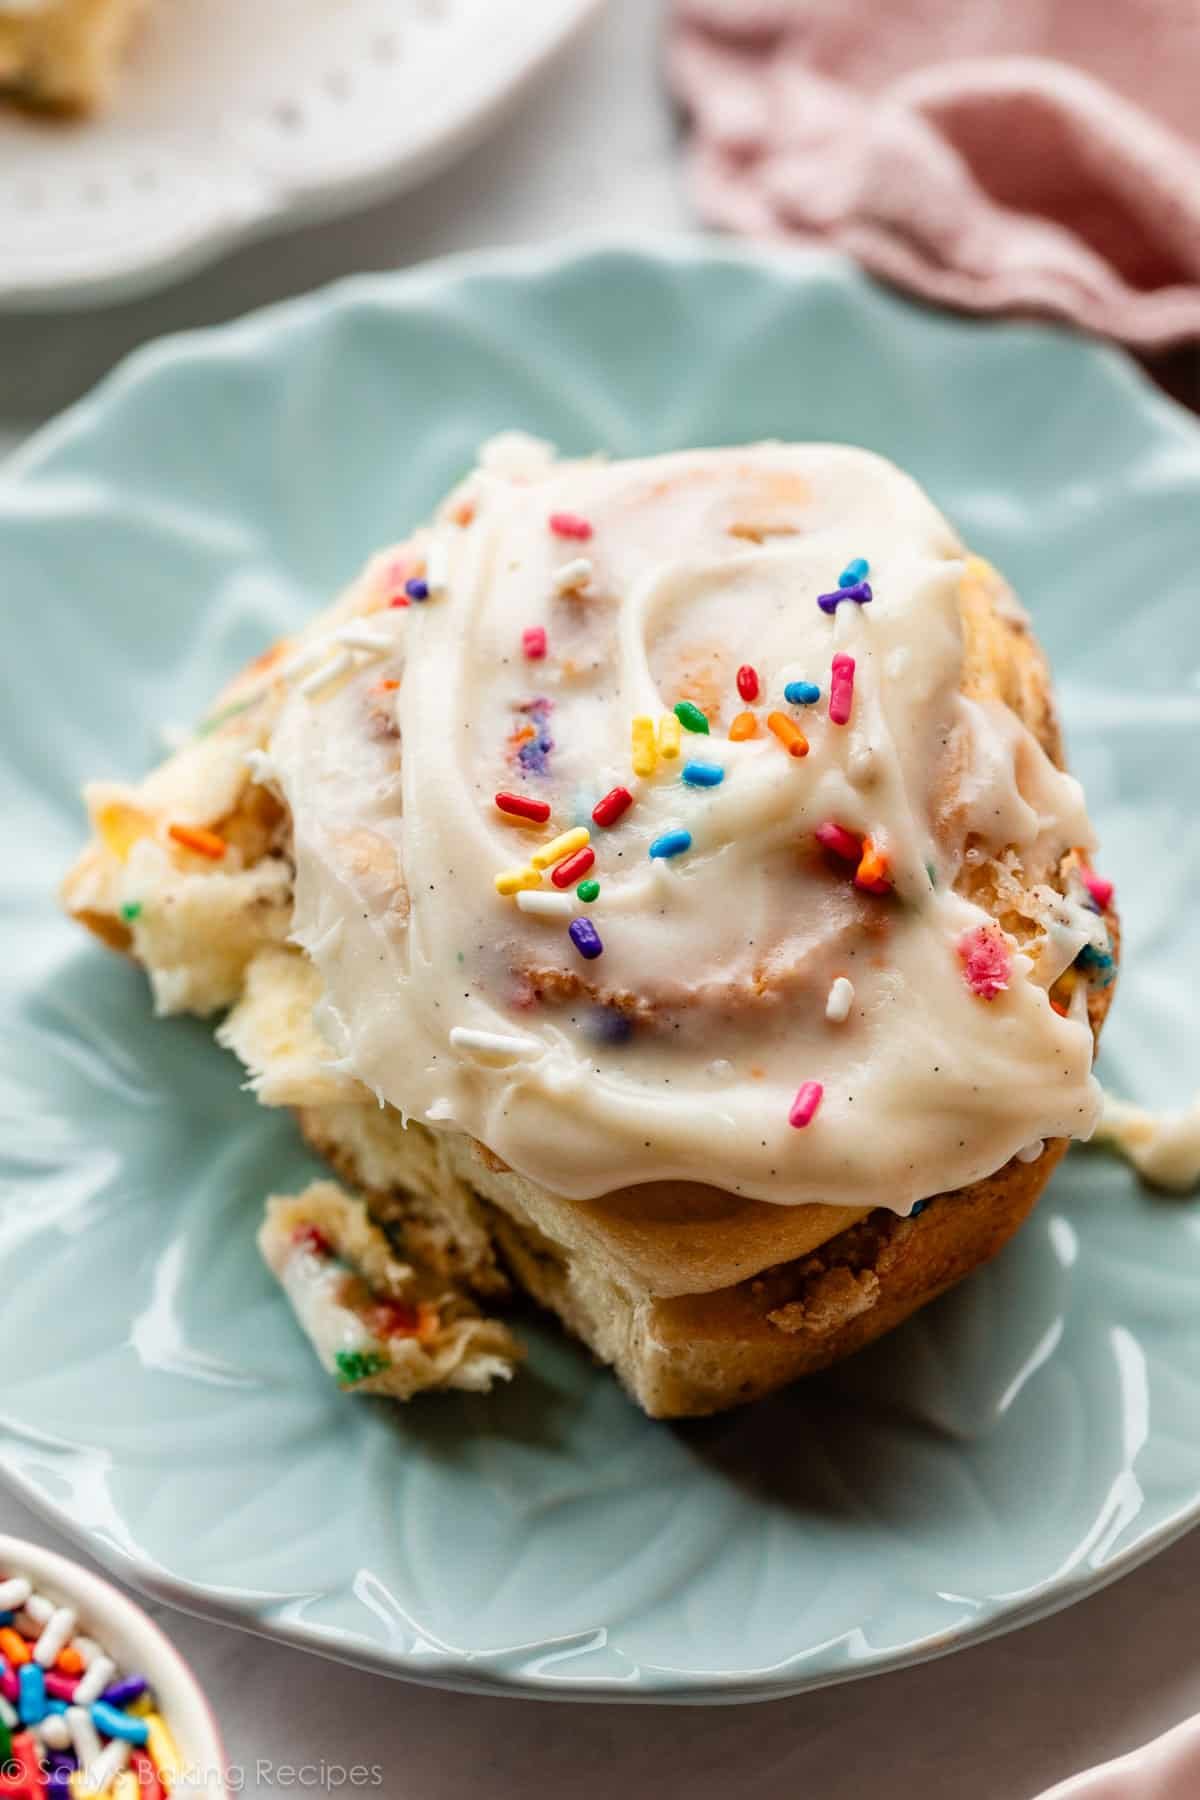
- Topped with cream cheese icing (and more sprinkles!)
- Almost like having confetti cake for breakfast
The dough for these birthday cake cinnamon rolls comes from my raspberry sweet rolls. It’s my favorite dough, and I based my ultra-popular overnight cinnamon rolls recipe off of it, too. And it’s quite easy! If you’re afraid of working with yeast, please do not be intimidated; there is hardly any “work time” involved, just some “wait time” as the yeast does its job.
Patience is yeast’s best friend.
Are You a Yeast Beginner?
This Baking with Yeast Guide is a wonderful starting point. I answer many common yeast FAQs in easy-to-understand explanations, so you can learn the basics before beginning.
I chose to use this particular dough recipe as the base for these colorful rolls because I love how fluffy the end result is. The rolls are soft, tender, buttery, and sweet and truly make a wonderful “starter” dough recipe for any sort of filling. And I figured their fluffy, pillow-y texture and buttery taste would make the perfect base for a confetti cake center. Swirls of sprinkles and sweet dough—how can you go wrong?
Grab These Ingredients for the Sweet Roll Dough:
- Whole Milk: Whole milk is ideal for the richest-tasting sweet rolls. Buttermilk works just as well without any changes to the recipe.
- Sugar: You need white granulated sugar for the dough, both for flavor (these are sweet rolls, after all) and to feed the yeast. You’ll use some again in the filling.
- Yeast: You can use active dry or instant yeast. Follow the directions exactly as written regardless of which you choose.
- Butter: This is a rich dough, meaning it has fat to help guarantee softness. Use softened butter and, to help it blend easier, cut it into 4 pieces before adding.
- Vanilla: This is a new ingredient I use in the dough; the original recipe didn’t call for it. You also need vanilla in the icing. You can use vanilla extract or vanilla bean paste.
- Eggs: Like butter, eggs promise a softer, richer dough.
- Salt: Dough is bland without salt.
- Flour: Flour provides the dough’s structure. You can use either all-purpose flour or bread flour. You’ll notice the rolls are a little chewier if you use bread flour.
Here’s the dough:
I usually use a stand mixer to make this dough.
What if I Don’t Have a Stand Mixer? If you do not own a mixer, you can mix the dough together with a large wooden spoon/rubber spatula. It will take a bit of arm muscle. A hand mixer works, but the sticky dough repeatedly gets stuck in the beaters.
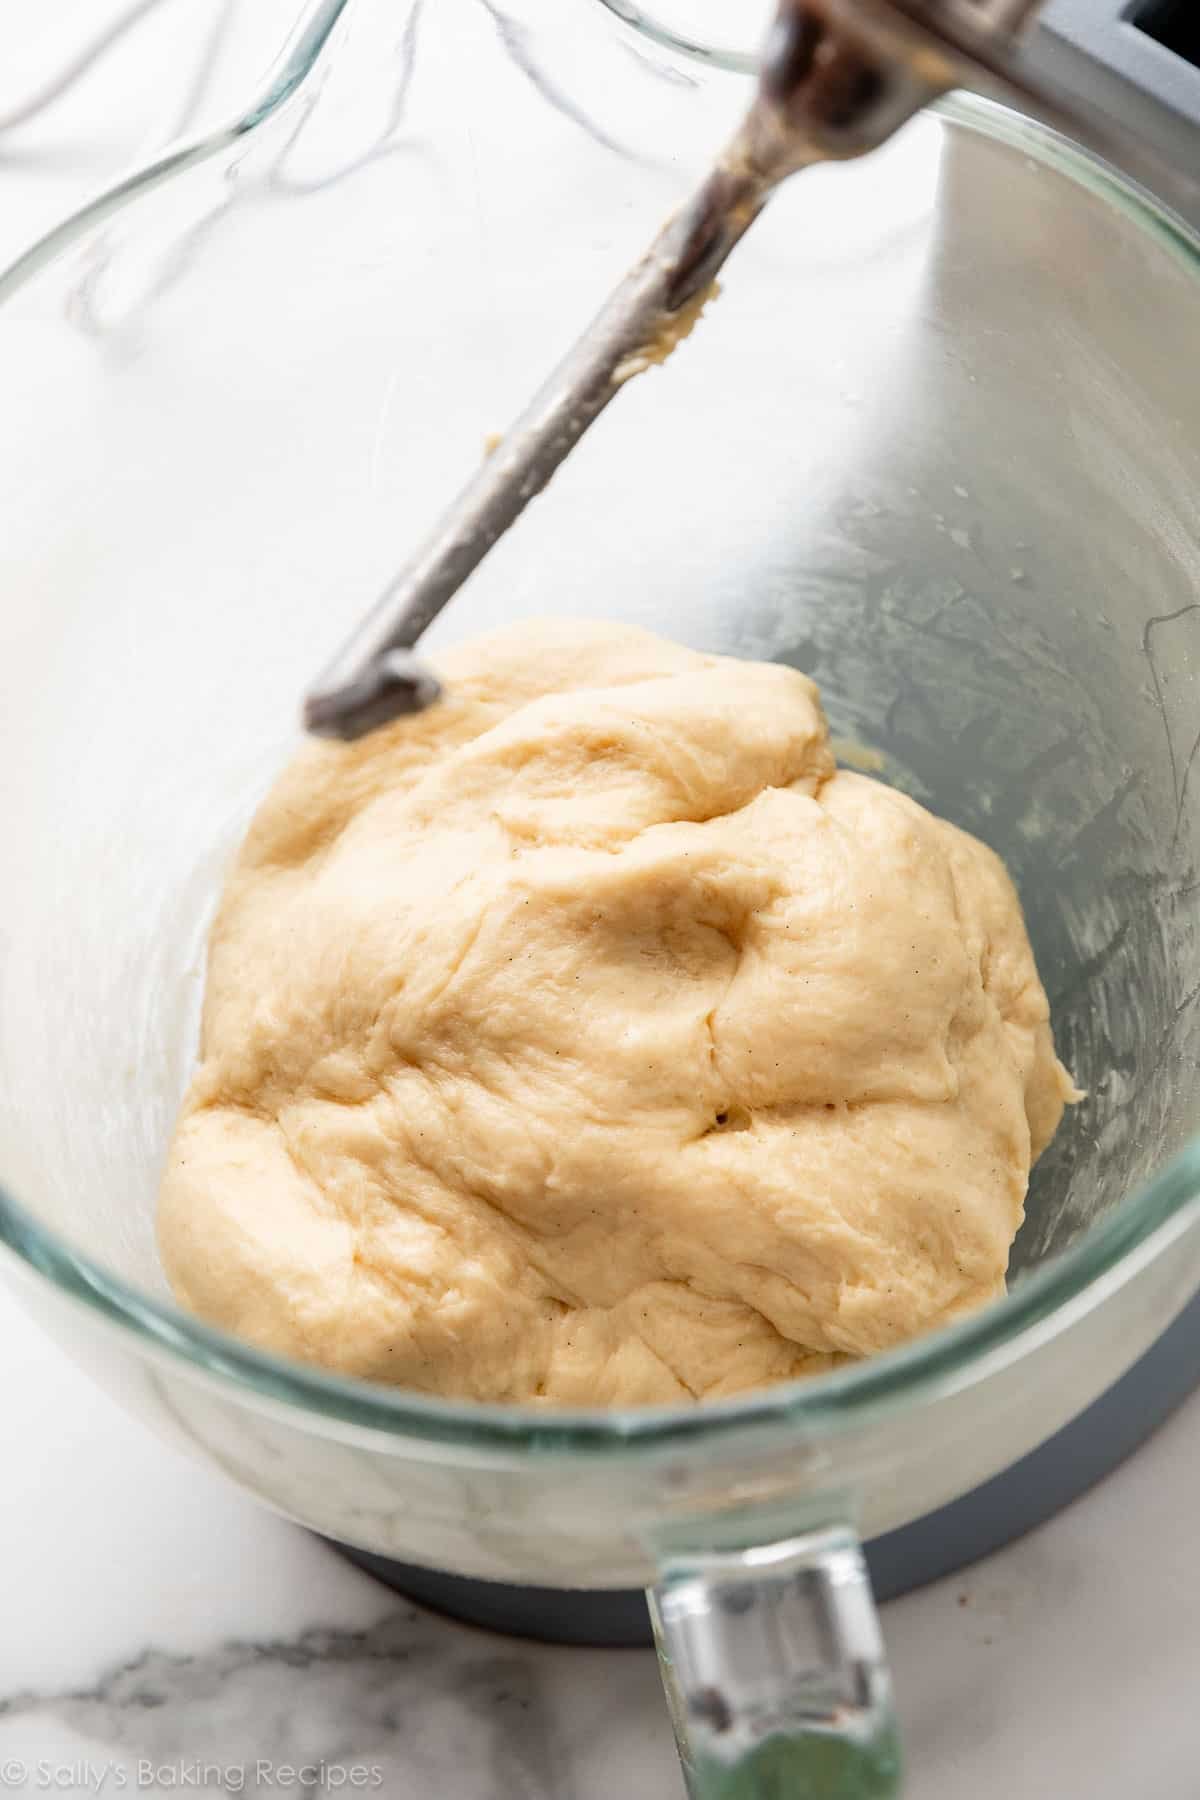
After the dough comes together, it will be a little soft and sticky—that’s normal. Knead the dough on a floured counter or keep it in the mixer for kneading—whichever method you use, it should be about 5 minutes of kneading.
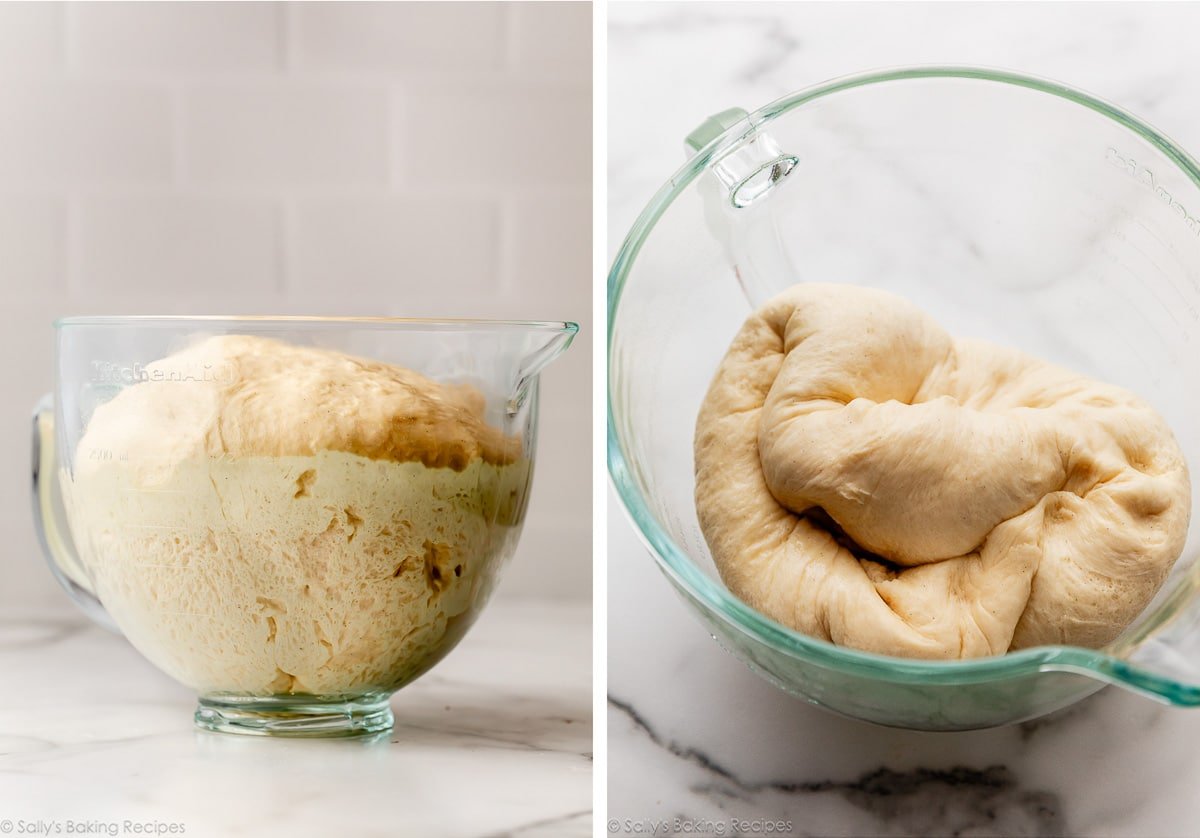
Place the dough into a lightly greased bowl, cover, and set it in a draft-free area to rise until doubled in size—it takes about 2 hours. After that, punch the risen dough down:
Roll it into a rectangle shape that’s about 12×18 inches in size. Then it’s time to fill it!
Baker’s Tip: If the dough keeps shrinking as you roll it out, stop what you’re doing, cover it, and let it rest for 10 minutes to relax the gluten. I often do this when I’m making pizza dough. When you return to the dough, it should stretch out much easier.
Cake Mix Filling
Now let’s talk about the filling. The crème de la crème of today’s rolls. How did I achieve the cake batter flavor without cake mix? Well, I began thinking about the texture and taste of actual cake mix. Creamy, buttery, powdery smooth, vanilla-y, and sweet. (Everything we know and love about these cake batter chocolate chip cookies!) I took those 5 main attributes and brainstormed ways to get them without using a box mix.
For that creamy taste and texture, the secret ingredient is powdered coffee creamer. You could also use dry milk powder. For the buttery flavor, I used (surprise!) melted butter. For the powdery smoothness, I used all-purpose flour. For the vanilla flavor, I used vanilla extract. And for the sweetness, I used a mix of white and brown sugars. Voila! You have a cake batter filling without a box cake mix.
Stir in 1/2 cup of sprinkles, but do not use nonpareils (the little balls) in your homemade cake batter mix. I always say non! to nonpareils in baked goods because they bleed their colors in the oven. You can sprinkle nonpareils on top of the frosted rolls before serving, however!

Fill the Rolls
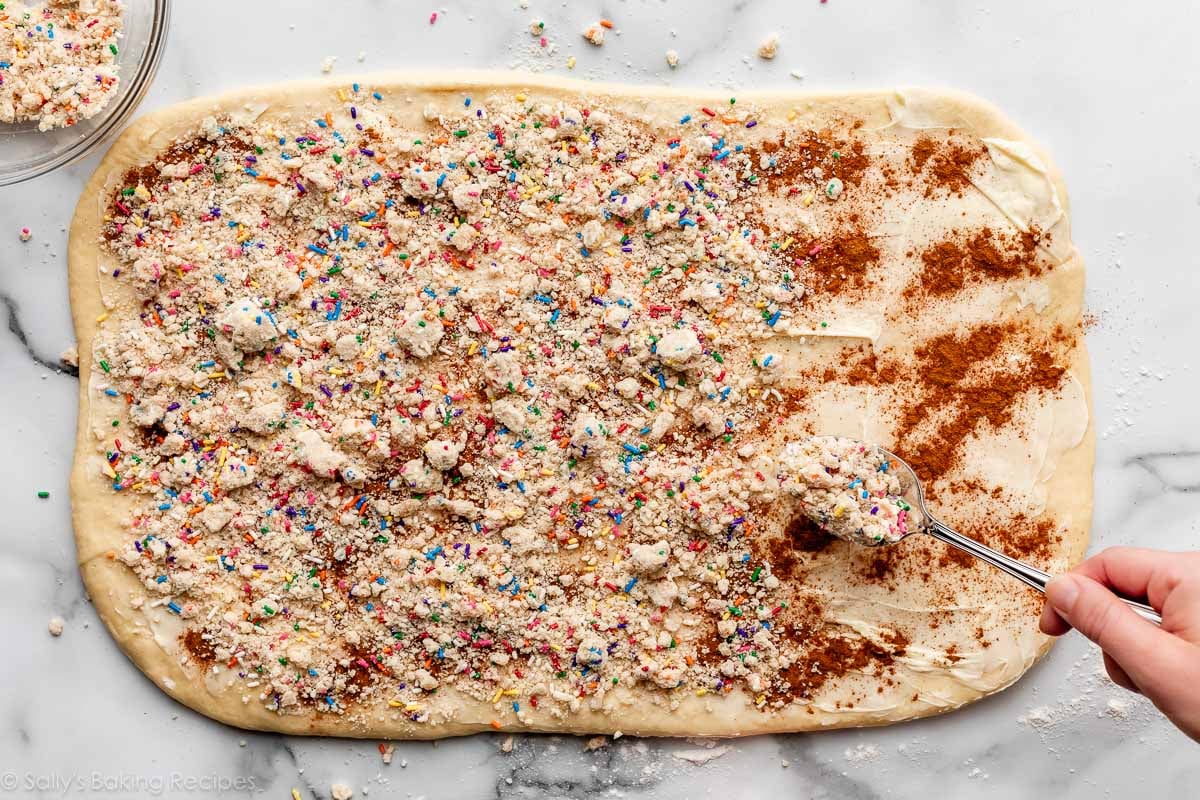
Spread softened butter all over the rolled-out dough, and then sprinkle with cinnamon, followed by the homemade cake crumbles. The butter will allow the crumbles to stick and the cinnamon is just necessary for cinnamon rolls, right?! I do not suggest leaving out the cinnamon as there may not be enough flavor without it. Plus, cake batter + cinnamon rolls… need I say more?
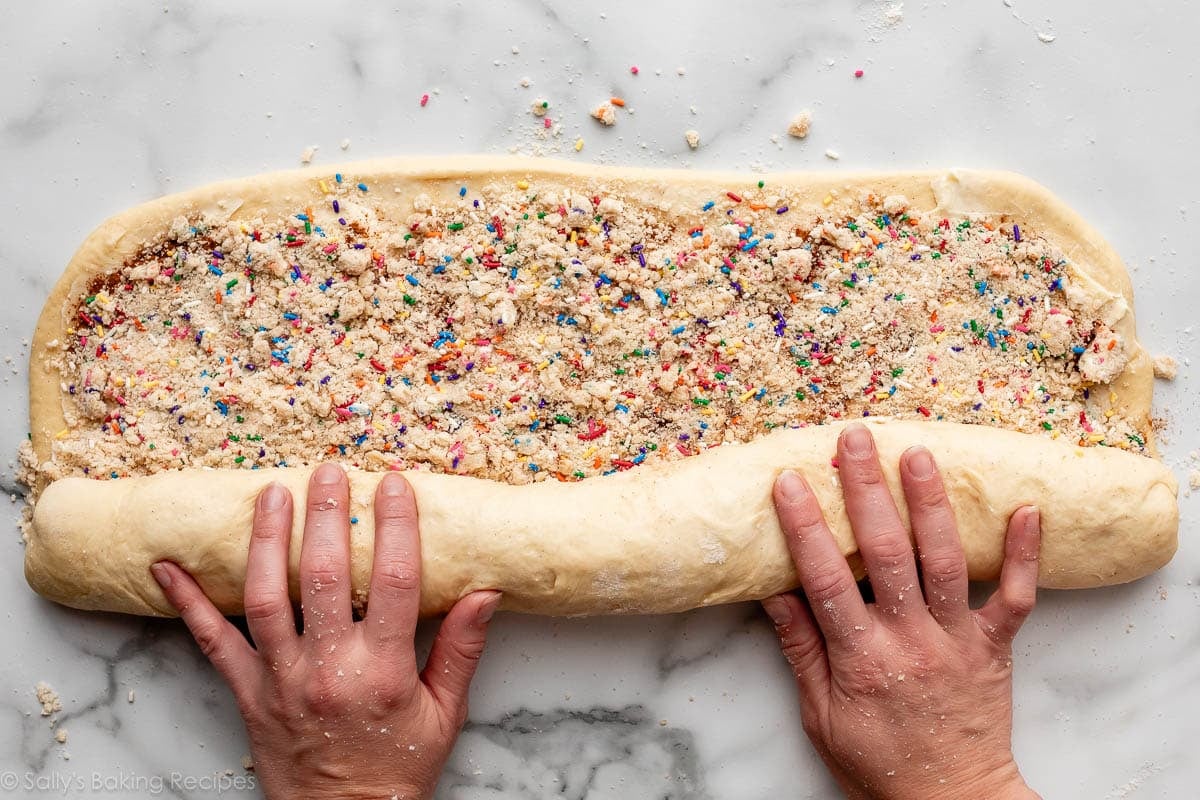
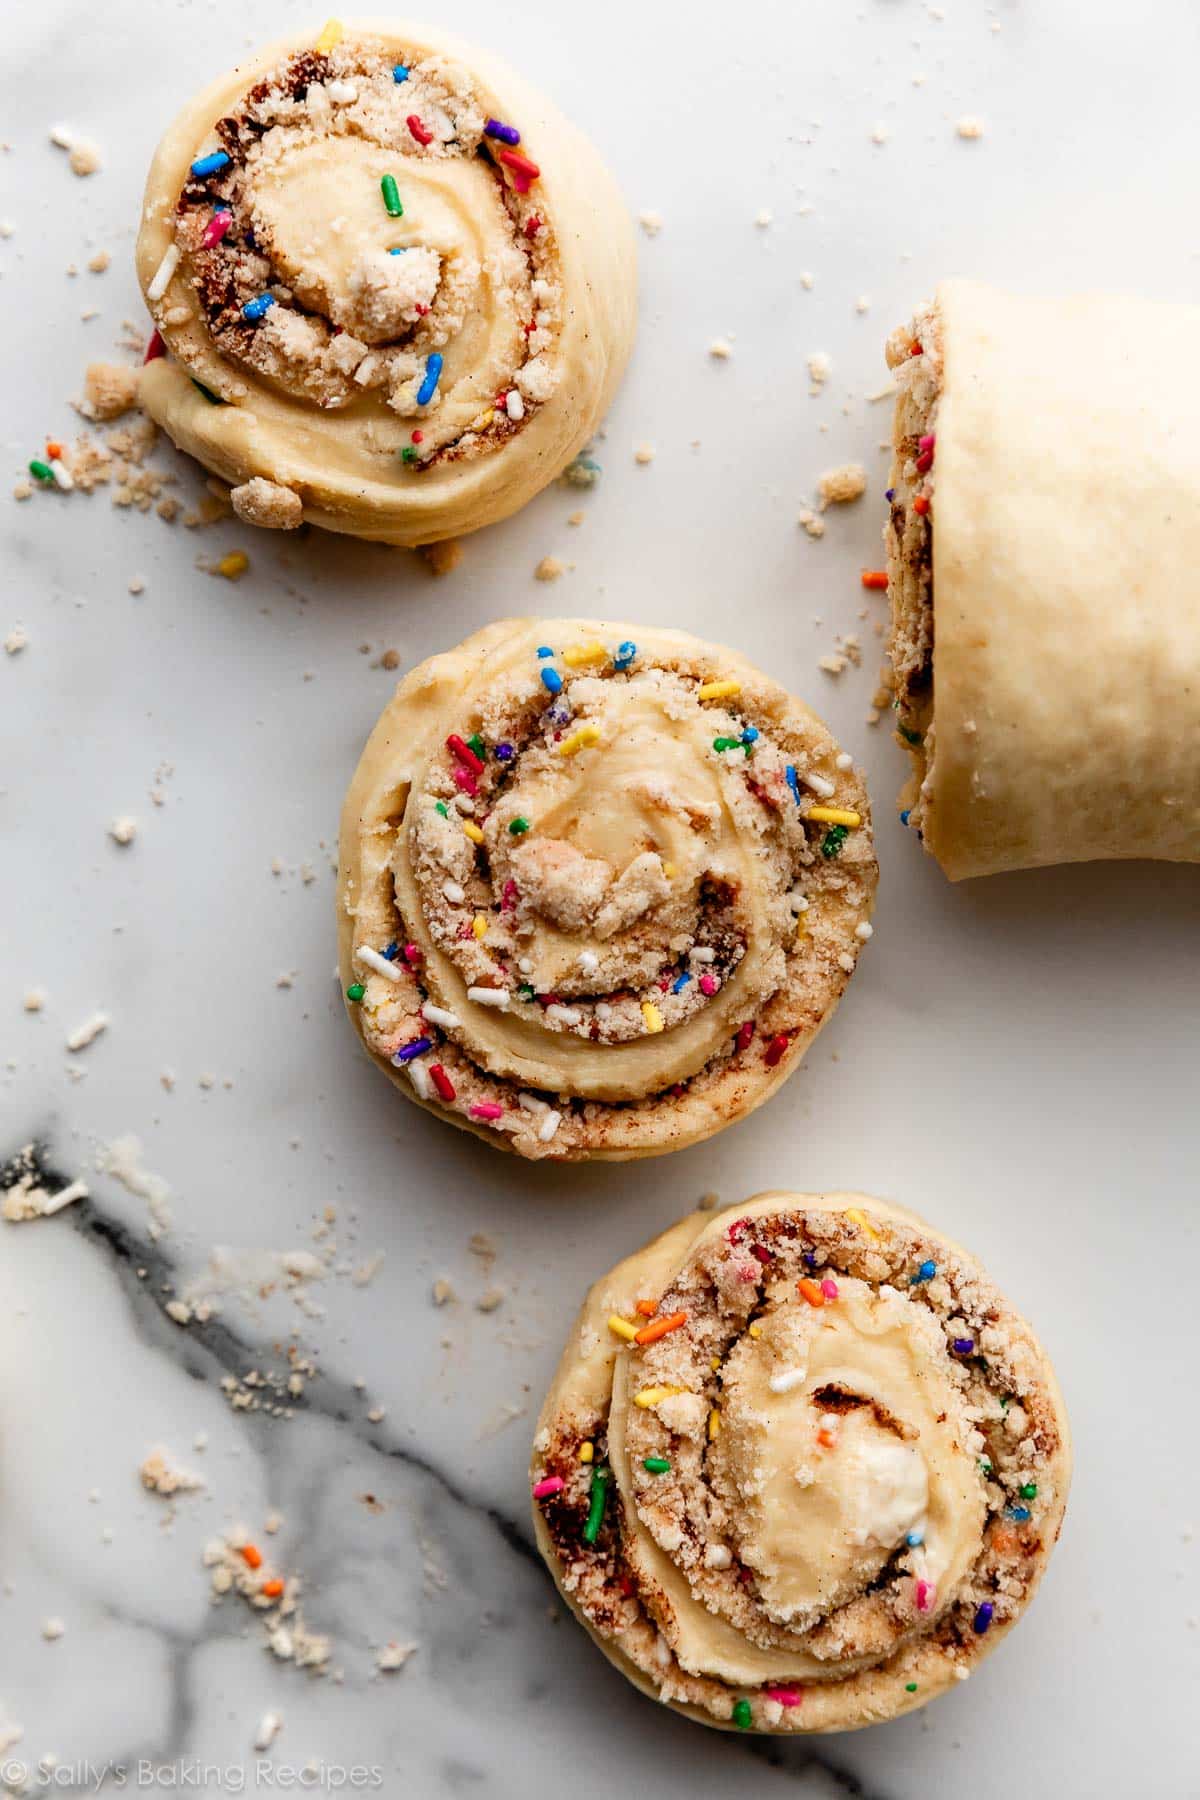
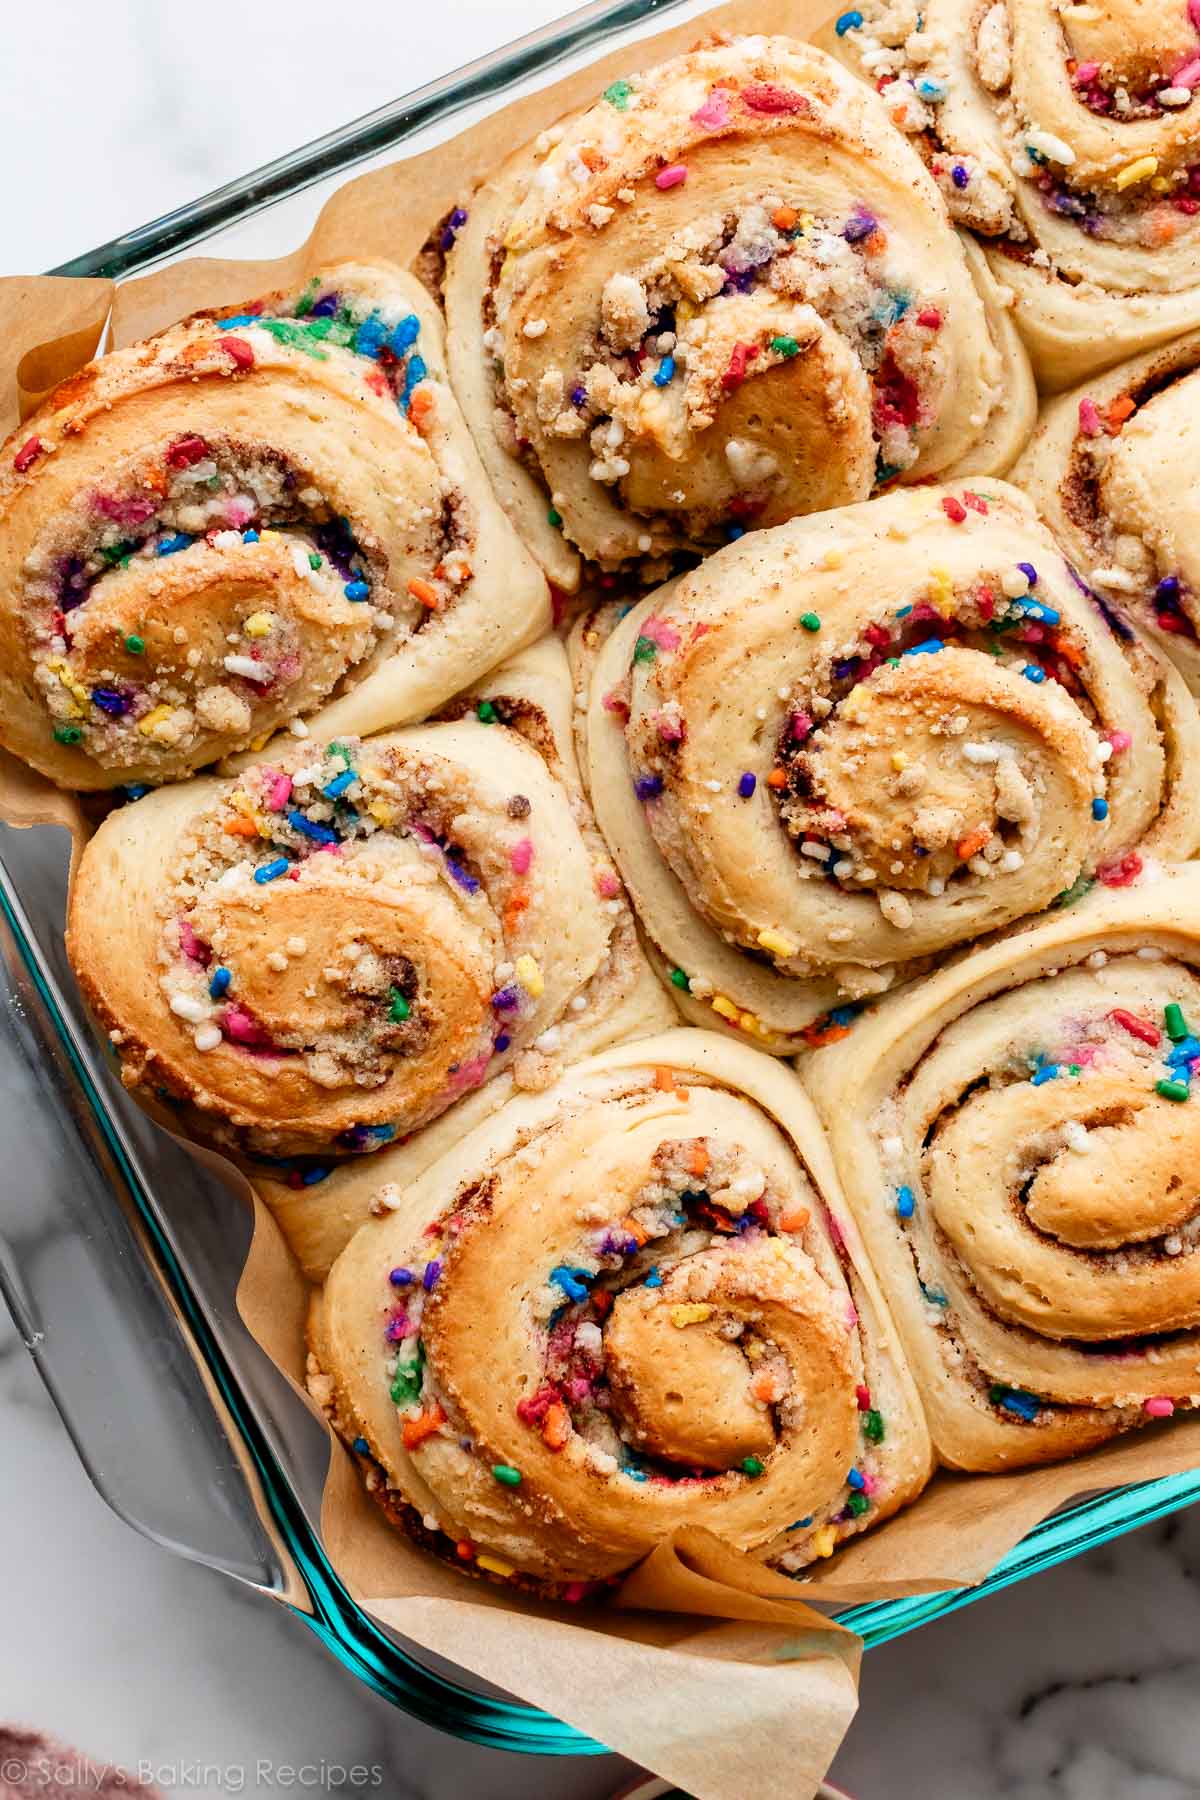
Use a very sharp knife to cut the roll into 12 rolls.
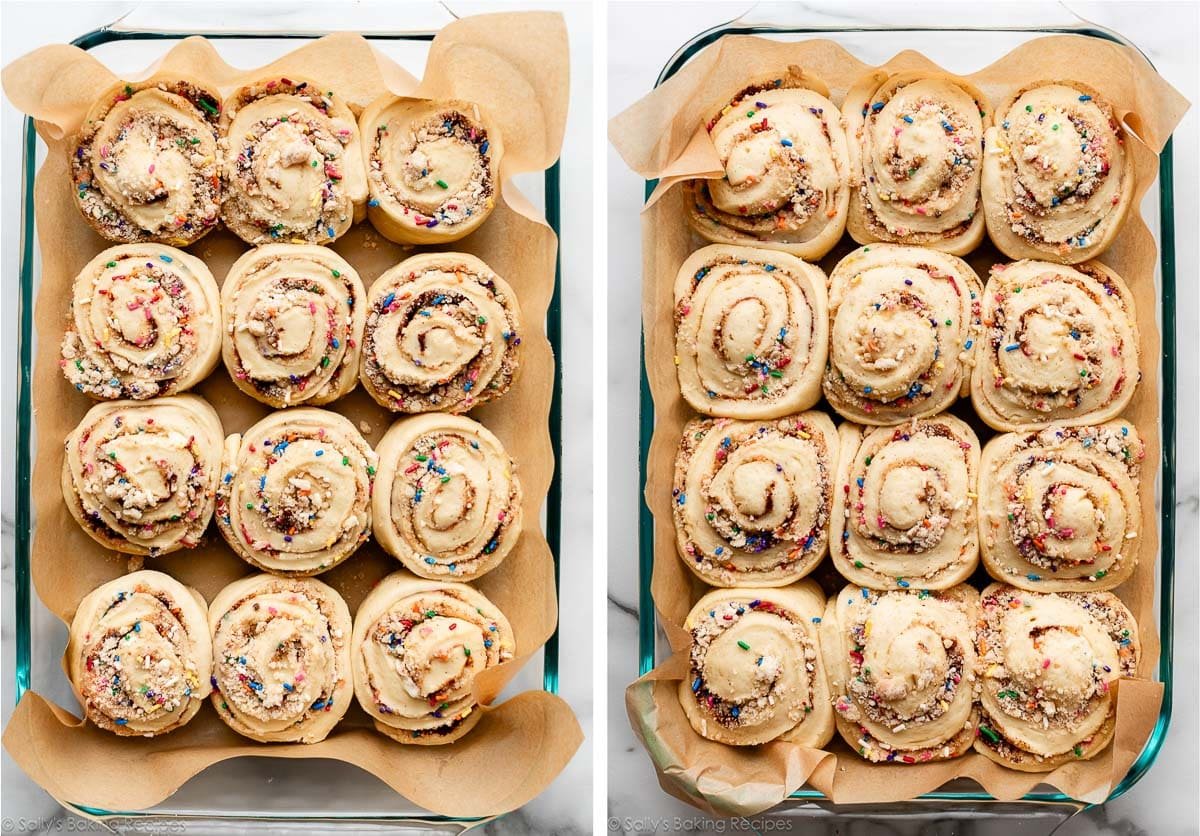
Arrange in a greased baking pan, cover, then let the rolls rise until a little puffy, about an hour. This is the 2nd rise. (Alternatively, you could let the rolls rise overnight. See Notes in the written recipe below for overnight instructions.)
Here are the sprinkle cinnamon rolls before and after that 2nd rise:
Then it’s time to bake. Your birthday breakfast is almost here!
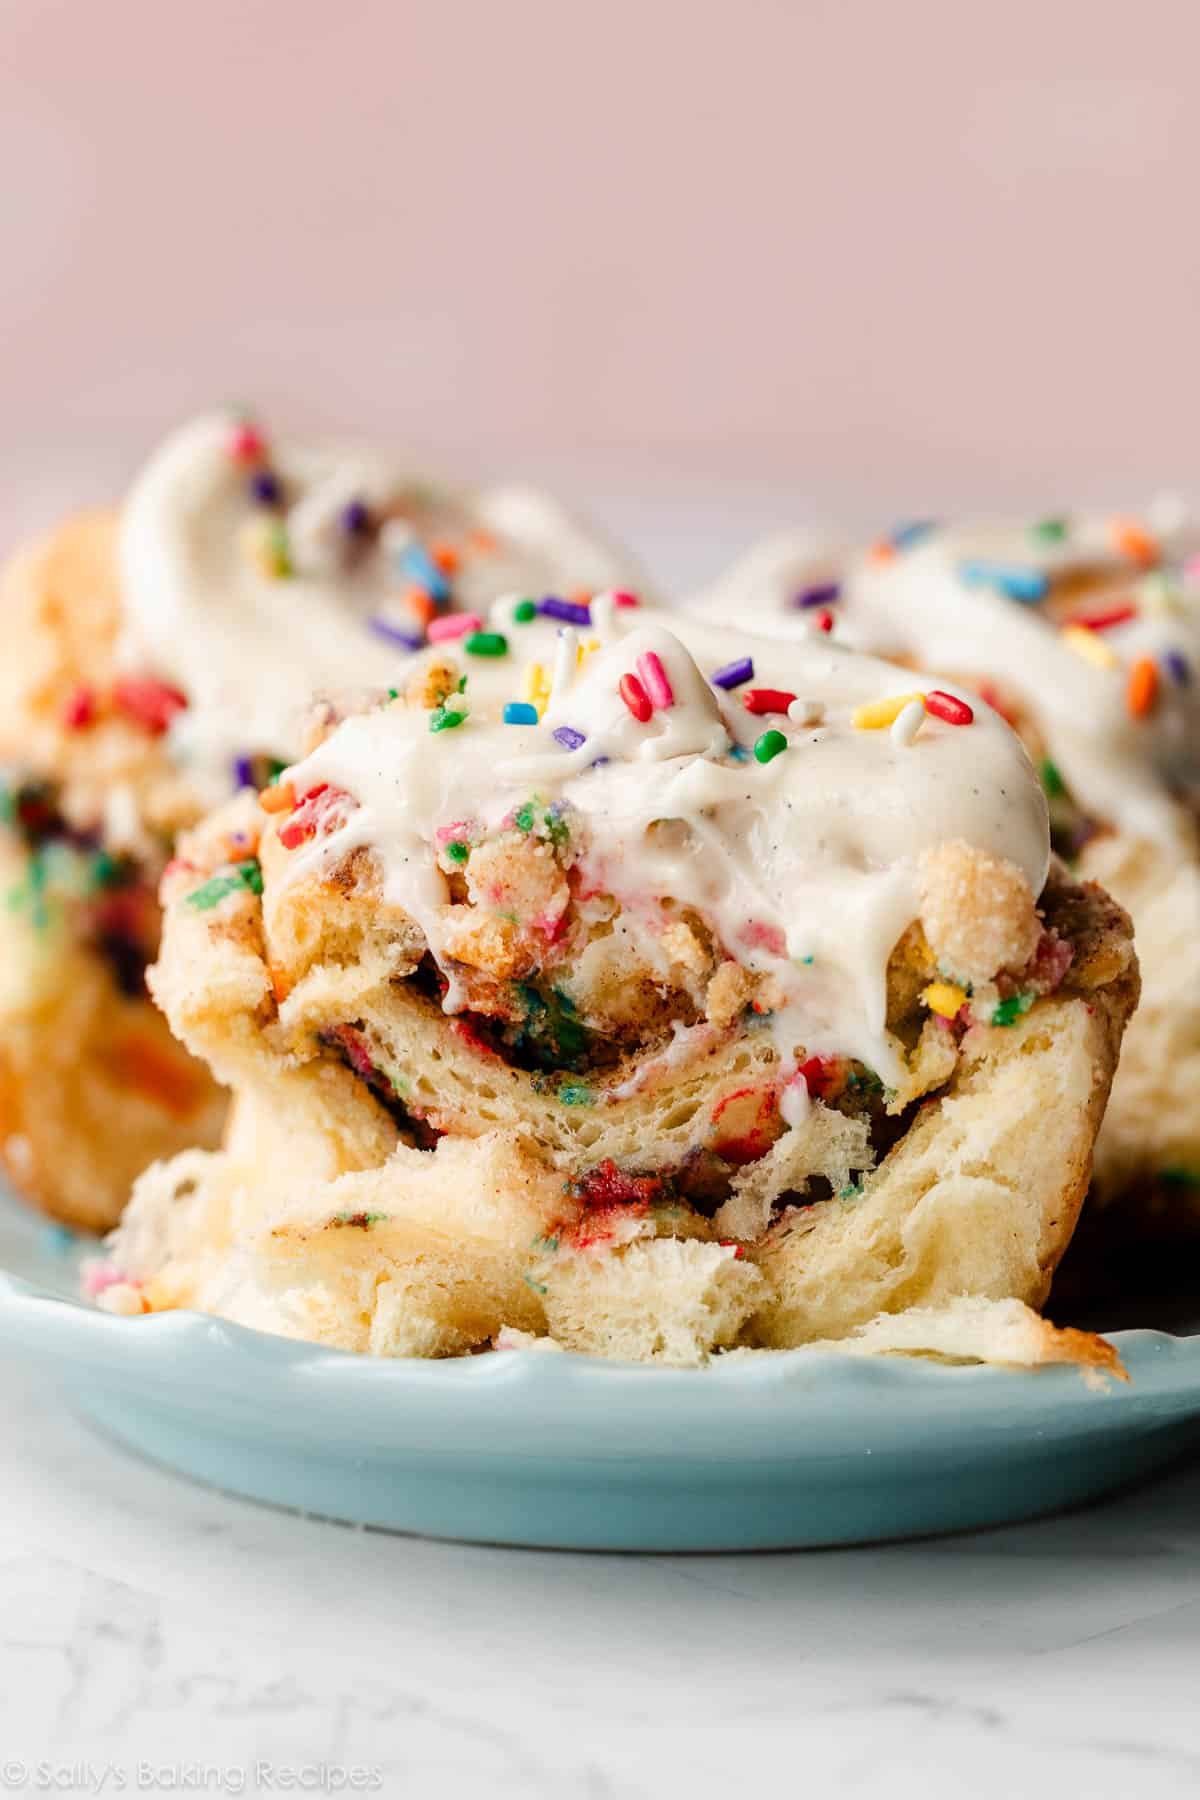
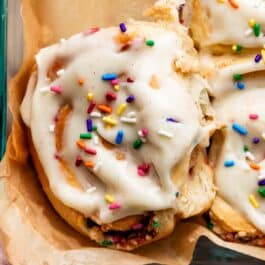
The Icing on the Cake 😉
The original version of this recipe called for vanilla icing, but I really, really love these sweet rolls with cream cheese icing. It’s the same deliciously smooth and silky icing I slather on my classic cinnamon rolls, as well as my raspberry swirl sweet rolls.
But feel free to use vanilla icing if cream cheese frosting isn’t your favorite.
I love the pops of color inside the swirls of soft, fluffy dough—a gorgeous tie-dye effect. It doesn’t matter what birthday you’re celebrating, whether it’s their 5th or 95th; kids and kids-at-heart can’t help but smile when they see these. I mean, just look at them—this is a birthday party in a breakfast pastry!

Birthday Cake Cinnamon Rolls (Like Funfetti Cake!)
Prep Time: 3 hours, 30 minutes (includes rises)
Cook Time: 25 minutes
Total Time: 4 hours (or overnight)
Yield: 12 rolls
Category: Breakfast
Method: Baking
Cuisine: American
Description
These birthday cake cinnamon rolls are like a cross between cinnamon rolls and confetti cake. The powdered coffee creamer is a non-negotiable in the filling, because it adds a creamy-like texture. Top the soft and sprinkle-loaded rolls with vanilla or cream cheese icing. You can make the birthday rolls within a few hours, or get started the night before using the overnight option in the Note below.
Dough
Filling
Cream Cheese Icing
Instructions
- Prepare the dough: Whisk the warm milk, 2 Tablespoons sugar, and the yeast together in the bowl of your stand mixer fitted with a dough hook or paddle attachment. Cover and allow mixture to sit for about 5 minutes or until foamy on top. *If you do not own a mixer, you can do this in a large mixing bowl and in the next step, mix the dough together with a large wooden spoon/rubber spatula. It will take a bit of arm muscle. A hand mixer works, but the sticky dough repeatedly gets stuck in the beaters. Mixing by hand with a wooden spoon or rubber spatula is a better choice.*
- On medium speed, beat in the remaining sugar (which should be 1/2 cup/100g) and the softened butter until it is slightly broken up. Add the eggs, vanilla, and salt and beat on medium speed until combined. The butter won’t really be mixing into the mixture, so don’t be alarmed if it stays in pieces. Switch the mixer down to low speed and with it running, add 1 cup of flour at a time, making sure it’s fully incorporated before adding the next. After 4 cups have been added, add the last 1/2 cup and beat until the dough comes together and pulls away from the sides of the bowl, about 3 minutes. Dough will be soft.
- Knead the dough: Keep the dough in the mixer (and switch to the dough hook if you used the paddle) and beat on low speed for an additional 5 minutes OR knead by hand on a lightly floured surface for 5 minutes. If kneading by hand, keep a small bowl of flour nearby to continually flour your hands, as the dough can be quite sticky. After kneading, poke the dough with your finger—if it slowly bounces back, your dough is ready to rise. If not, keep kneading.
- 1st Rise: Lightly grease a large bowl with oil or use nonstick spray. Place the dough in the bowl, turning it to coat all sides in the oil. Cover the bowl with aluminum foil, plastic wrap, or a clean kitchen towel. Allow the dough to rise in a relatively warm environment for 2 hours or until double in size. (I always let it rise on the counter and it takes about 2 hours. For a tiny reduction in rise time, see my answer to Where Should Dough Rise? in my Baking with Yeast Guide.)
- Grease the bottom and sides of a metal or glass 9×13-inch baking dish or line with parchment paper.
- Roll out the dough: Punch down the dough to release the air. Place dough on a lightly floured work surface and using a lightly floured rolling pin, roll dough into a 12×18-inch rectangle. Make sure the dough is smooth and evenly thick. If the dough keeps shrinking as you roll it out, stop what you’re doing, cover it lightly, and let it rest for 10 minutes to relax the gluten. When you return to the dough, it should stretch out much easier.
- Make the filling: Melt 2 Tablespoons (28g) of the butter. Reserve the rest for step 8. Whisk the flour, sugar, brown sugar, powdered coffee creamer, and salt together. Using a fork, mix in the melted butter and the vanilla extract until crumbly. Mix in the sprinkles. (*You will use the cinnamon in the next step.*)
- Spread dough with the remaining butter (6 Tablespoons). Sprinkle evenly with the cinnamon, and then the sprinkle filling mixture evenly on top. Tightly roll up the dough to form an 18-inch-long log. With an extra sharp knife, cut into 12 even rolls, about 1.5 inches each. Arrange in the prepared baking pan.
- 2nd Rise: Cover the rolls tightly and allow to rise until puffy, about 1 hour. (Or use the overnight option in the Notes below.)
- Preheat the oven to 350°F (177°C).
- Bake for about 25–28 minutes or until they are lightly browned on top. About halfway through baking time, tent a piece of aluminum foil over the pan to prevent the tops from browning too quickly. Remove pan from the oven and place pan on a wire rack for about 10 minutes as you make the icing.
- Make the icing: In a medium bowl using a handheld or stand mixer fitted with a paddle or whisk attachment, beat the cream cheese on medium speed until smooth and creamy. Add the confectioners’ sugar, cream/milk, and vanilla. Beat on low speed for 30 seconds, then switch to high speed and beat for 1 minute. Spread the icing over the warm rolls, garnish with extra sprinkles if desired, and serve immediately.
- Cover leftover frosted or unfrosted rolls tightly and store at room temperature for up to 2 days or in the refrigerator for up to 5 days.
Notes
- Make Ahead Instructions – Overnight: To prepare the night before serving, prepare the rolls through step 8. Cover the rolls tightly and refrigerate for 8–12 hours. (16 hours max. 8–12 hours is best, but 16 hours is OK if absolutely needed. Do not exceed 16 hours.) The next morning, remove from the refrigerator and allow to rise on the counter for 1–2 hours before continuing with step 10.
- Make Ahead Instructions – Freezing: Baked rolls can be frozen for up to 3 months. Thaw overnight in the refrigerator and warm up before enjoying. You can also freeze the unbaked rolls and here’s how: bake the rolls in step 9 for only about 10 minutes. Cool completely, then cover tightly and freeze. To serve, take the rolls out of the freezer and place in the refrigerator overnight to thaw. Once thawed, finish baking them for about 15–20 minutes.
- Special Tools (affiliate links): Stand Mixer | Rolling Pin | 9×13-Inch Glass Baking Pan or Metal Baking Pan | Glass Mixing Bowls
- Milk: I recommend using whole milk for the best, richest-tasting dough. You could also use buttermilk. Reduced-fat, low-fat, or nondairy milk works in a pinch. Do not use nonfat milk.
- Yeast: You can use active dry or instant yeast in this recipe. Follow all of the same instructions. If using active dry yeast, the rise times are usually slightly longer. Reference my Baking with Yeast Guide for answers to common yeast FAQs.
- Vanilla: I love using vanilla bean paste in this recipe because it combines both extract AND vanilla bean seeds, and tastes phenomenal in the dough AND icing. You can, of course, use pure vanilla extract instead.
- Powdered Coffee Creamer: This ingredient is important in the filling. It adds a creamy-like consistency and taste to the filling, which helps the filling replicate cake mix or cake batter. If you don’t have it, you can use the same amount of nonfat instant dry milk instead.
- Alternate Icing Option: Instead of cream cheese icing, you can top the warm rolls with vanilla icing.
Keywords: cake batter cinnamon rolls, birthday cinnamon rolls
https://sallysbakingaddiction.com/cake-batter-cinnamon-rolls-without-cake-mix/”>
#Birthday #Cake #Cinnamon #Rolls #Funfetti #Sallys #Baking #Addiction